Server Support for Installing DHCP Service
The Dynamic Host Configuration Protocol (DHCP) is a TCP/IP Suite Application Protocol that works on the Client/Server Model. DHCP provides automatic IP Addresses to the organization’s devices within the network. Once you learn to install DHCP Service on Windows Server 2012, you will no longer need to assign IPs manually to each client machine on the network.
Requirements:
- A properly Installed/Updated Windows Server Opretaing System
- Administrator Account credentials
- Static TCP/IP Address
Benefits:
ü Time Saving
ü No conflicts
ü Administration tasks made easy
Here’s a step by step guide on how to install DHCP Service on Win Server 2012:
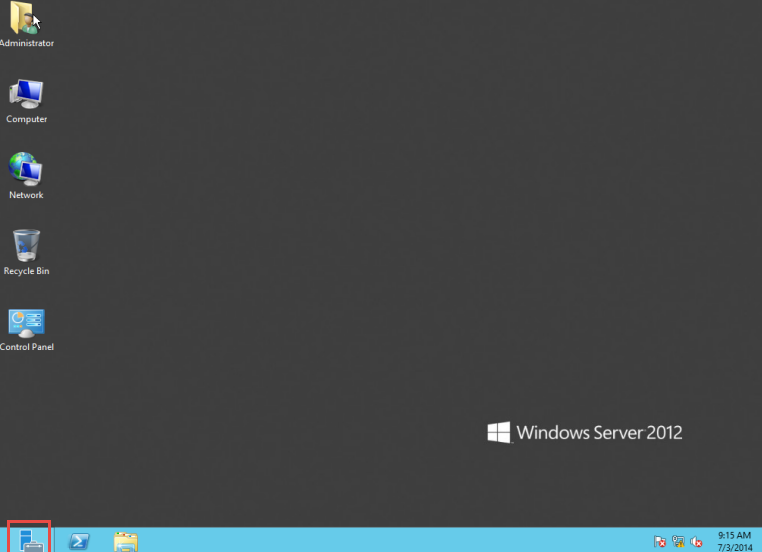
Step 1: Open the “Server Manager.” (Check the screenshot below)
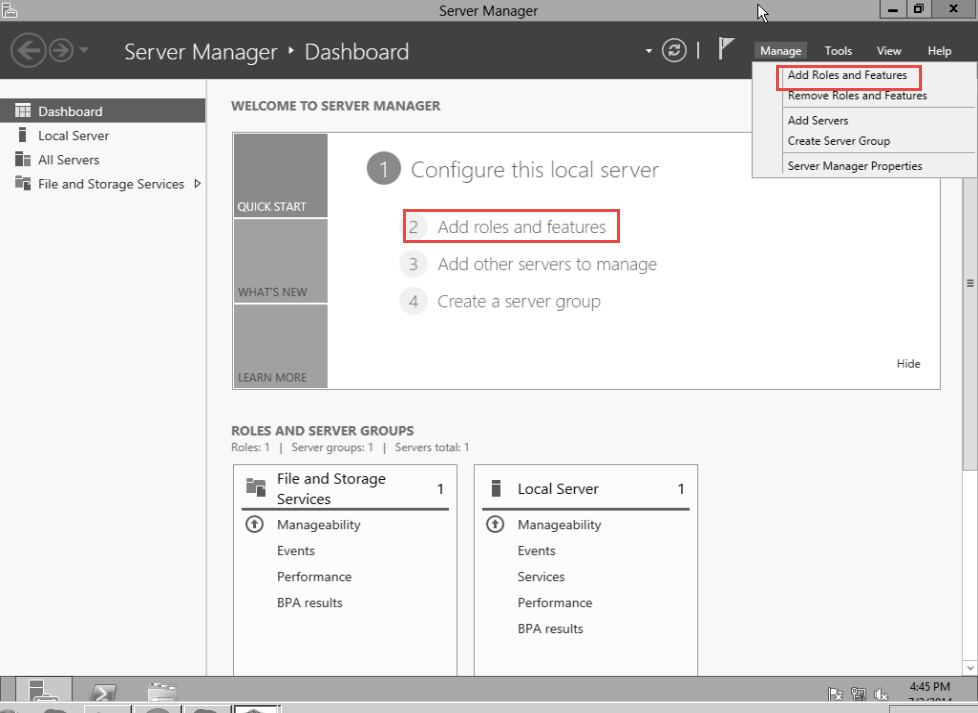
Step 2: Select the “Manage” option in the left panel and click on the “Add Roles and Features” button. (Check the screenshot below)
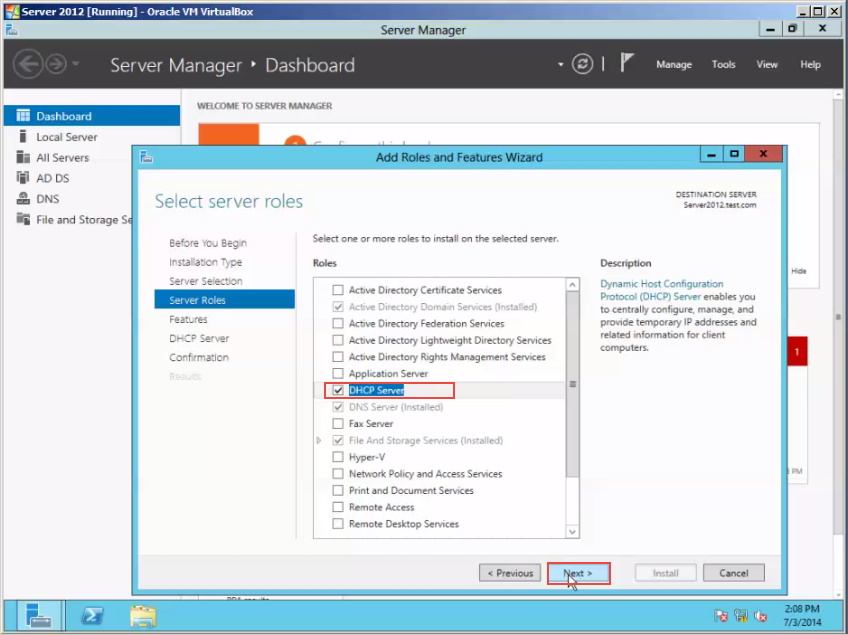
Step 3: Select the “DCHP Server”. (Check the screenshot below)
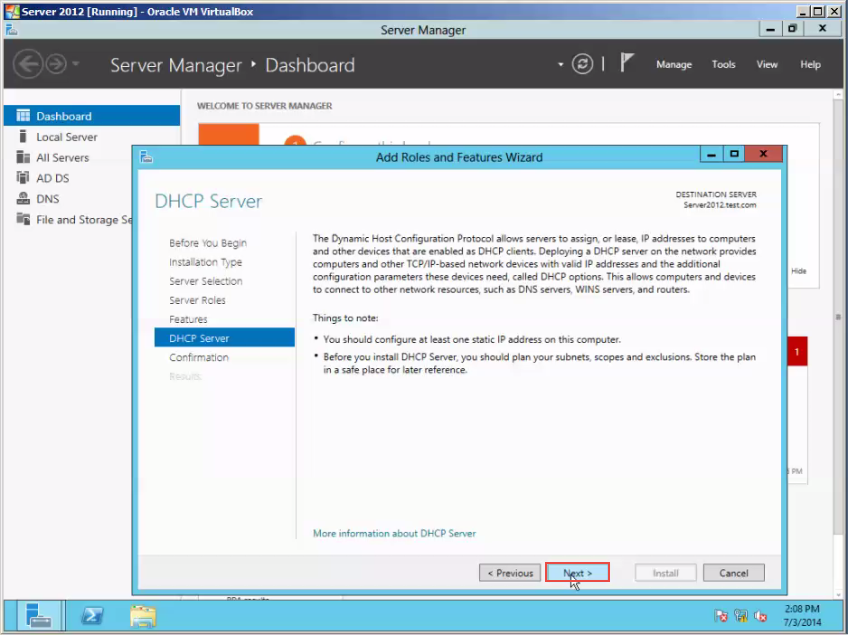
Step 4: Click on the “Next” button. (Check the screenshot below)
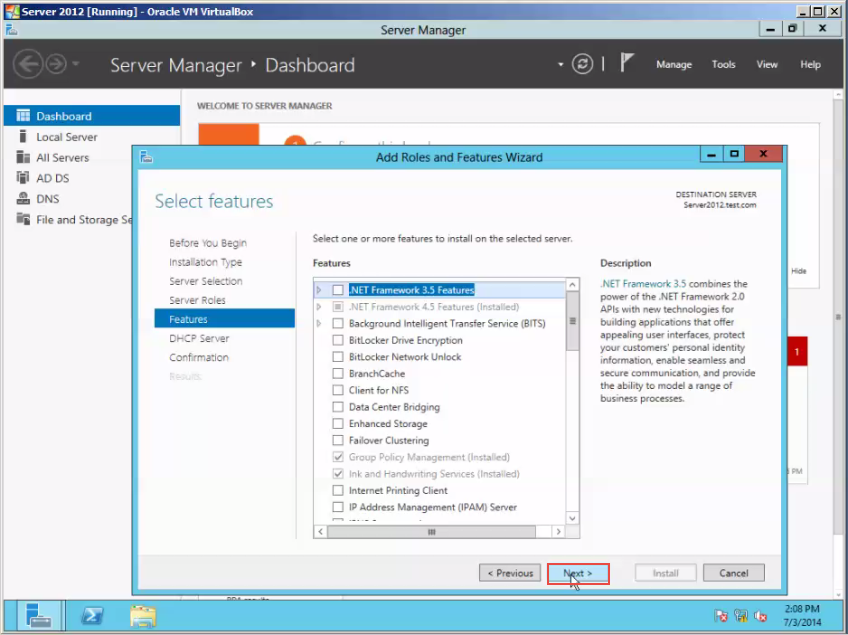
Step 5: Click on the “Next” button again. (Check the screenshot below)
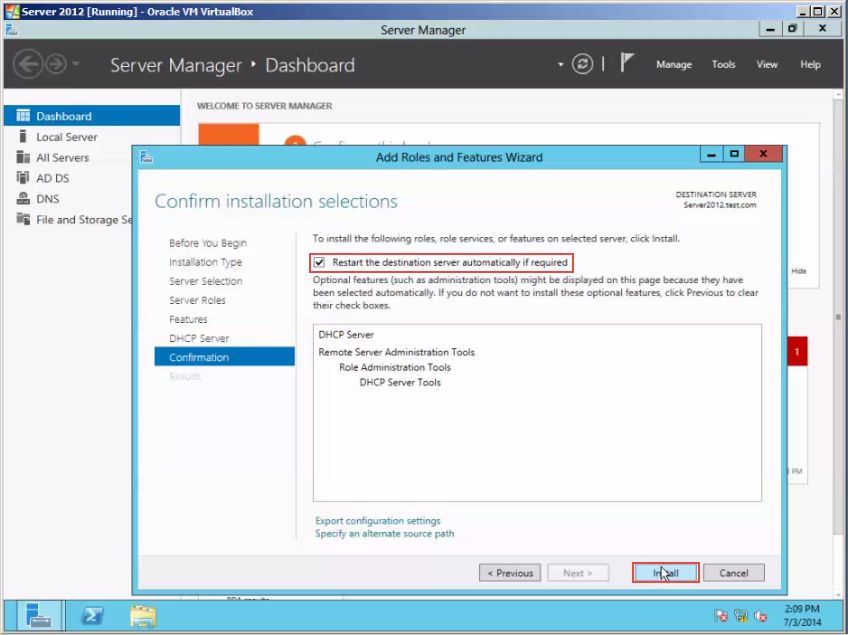
Step 6: Now, click on the “Restart If Required” option. (Check the screenshot below)
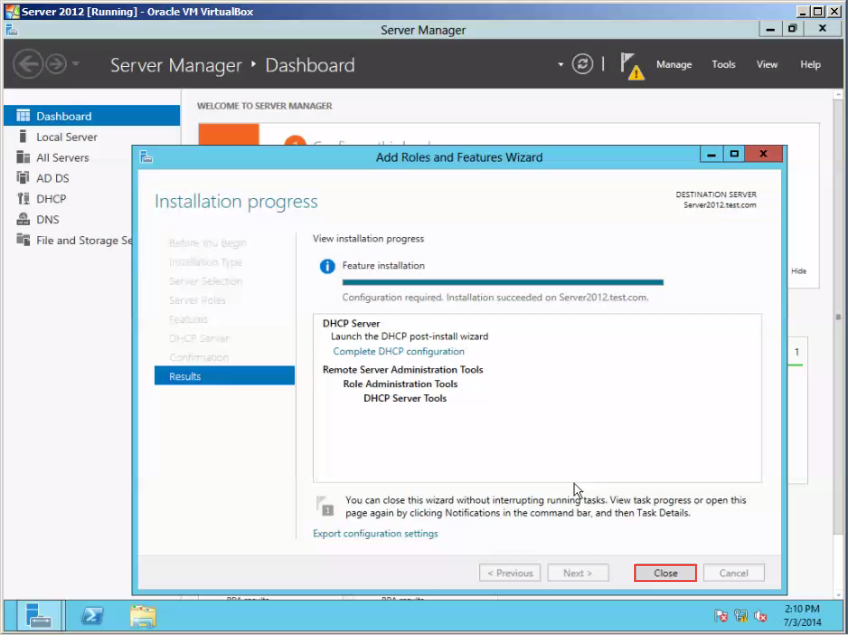
Step 7: Click on the “Close” button to exit. (Check the screenshot below)
Step 8: You have installed the “Role.” (Check the screenshot below)
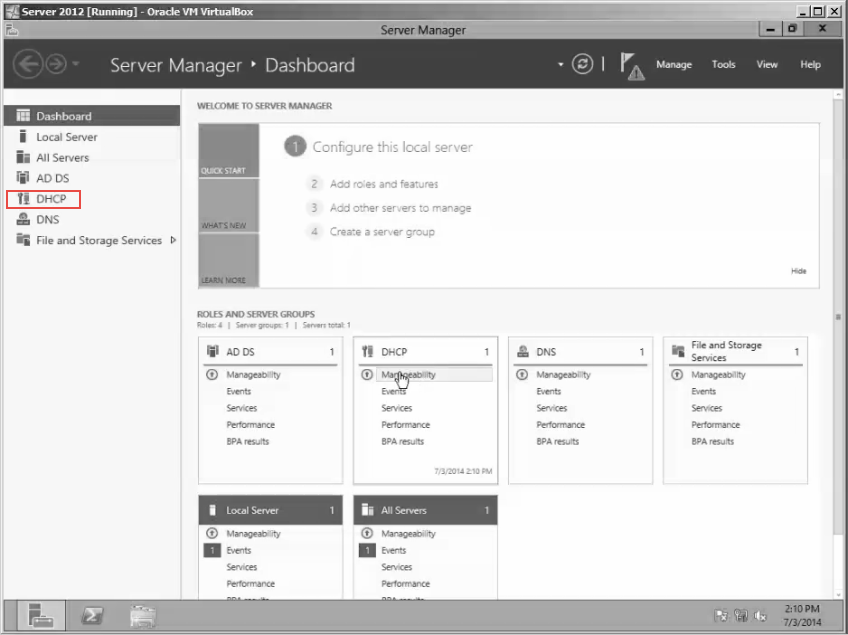
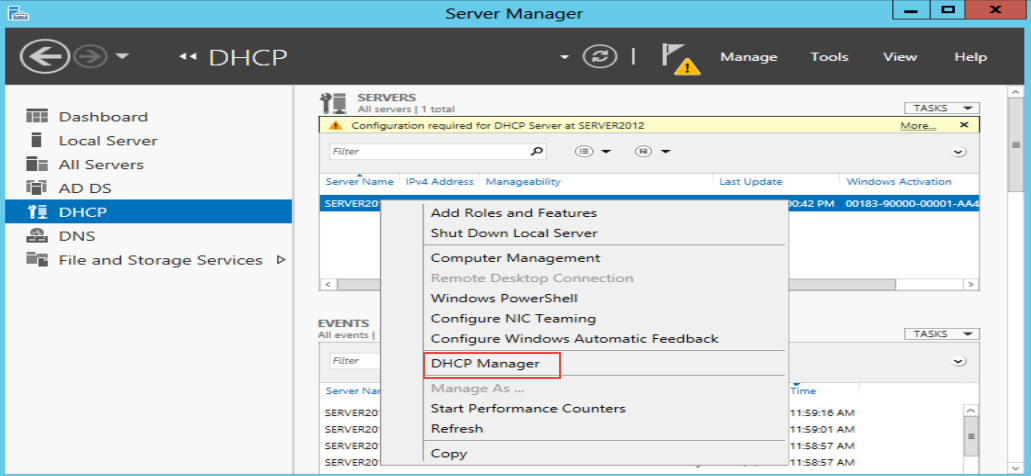
Step 9: Open the DHCP Manager. (Check the screenshot below)
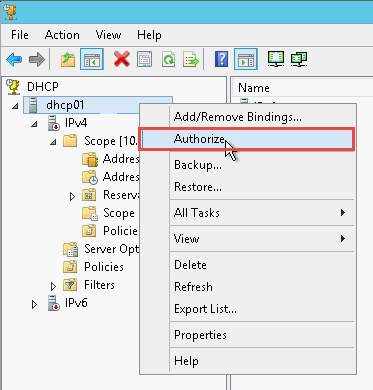
Step 10: Right click on the DHCP Server and next, click on the “Authrize” button. (Check the screenshot below)
Do You Need Help With This?
In case you need more assistance on certain issues you’re facing while installing DHCP Service on Server 2012, write a comment below. A Win Server pro will promptly revert to your questions.


