DNS Server 2008 Setup
For installing a Domain Name System (DNS) server, you must add the DNS server role to an existing “Windows Server 2008” server. The DNS server role can also be installed at a time you install the Active Directory Domain Services (AD DS) role. However, this method is generally used in case you wish to integrate DNS domain namespace with AD DS domain namespace.
The following article describes the steps on how to install Domain Name System (DNS) in Windows Server 2008:
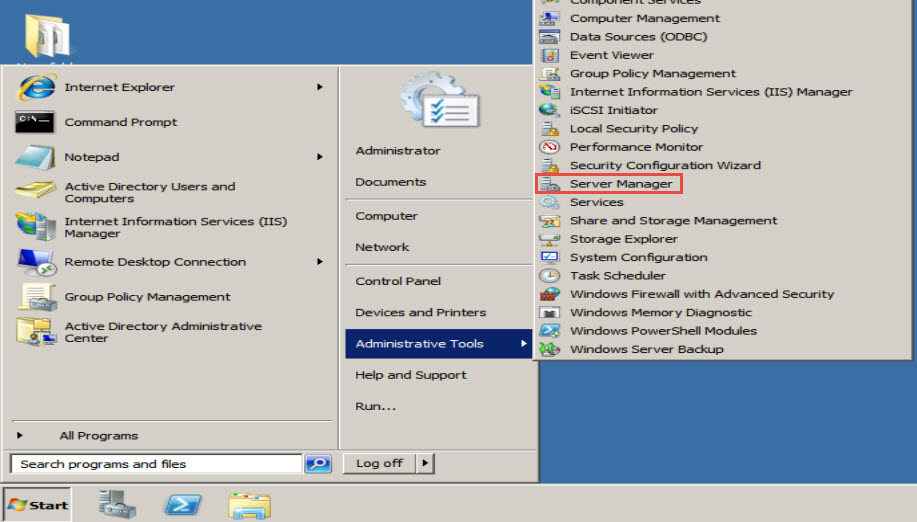
Step 1: To get started, go the “Start” button and right click on the “Administrative Tools” option.
Step 2: Amongst the many options that appear in the dropdown menu, click on the “Server Manager” option. (Check the screenshot below)
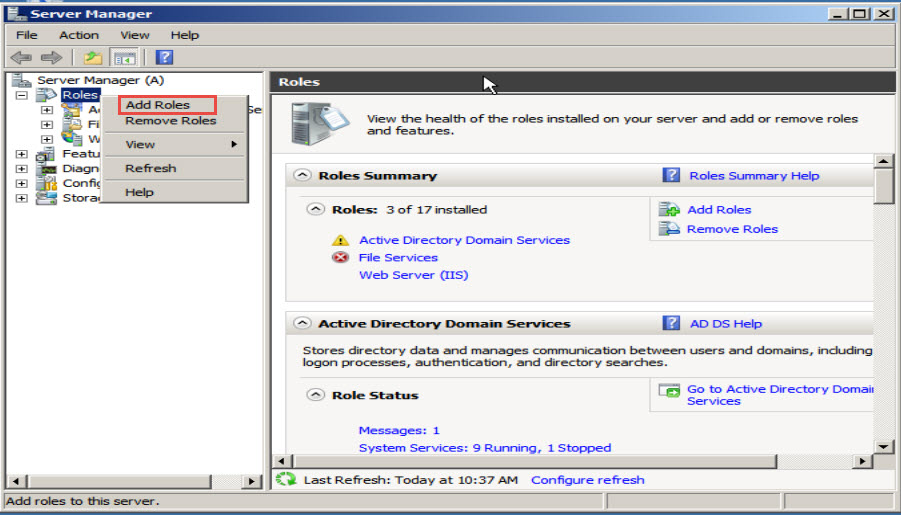
Step 3: Right click on the “Roles” option in the left side panel of the “Server Manager” window.
Step 4: Next, click on the “Add Roles” option. (Check the screenshot below)
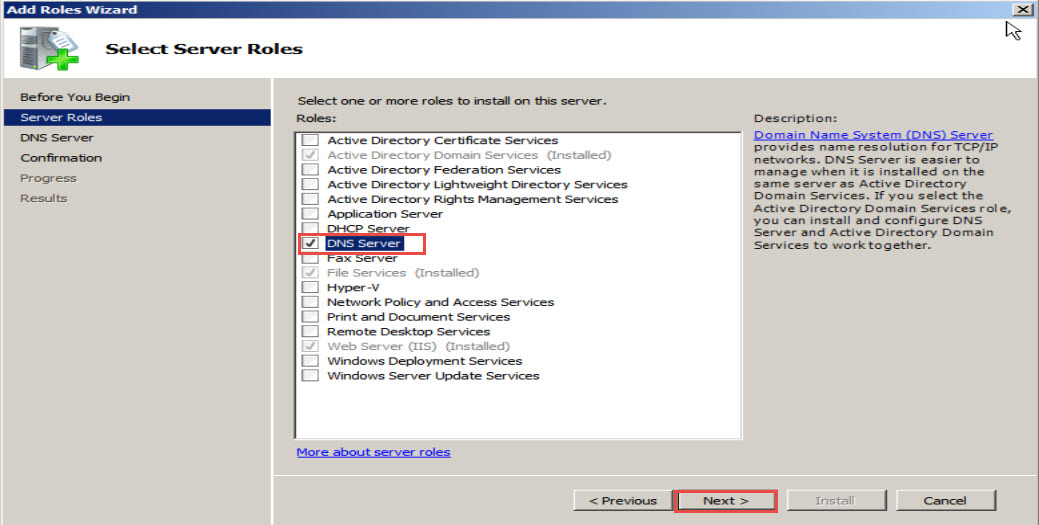
Step 5: Select the “DNS Server” option and click on the “Next” button to continue. (Check the screenshot below)
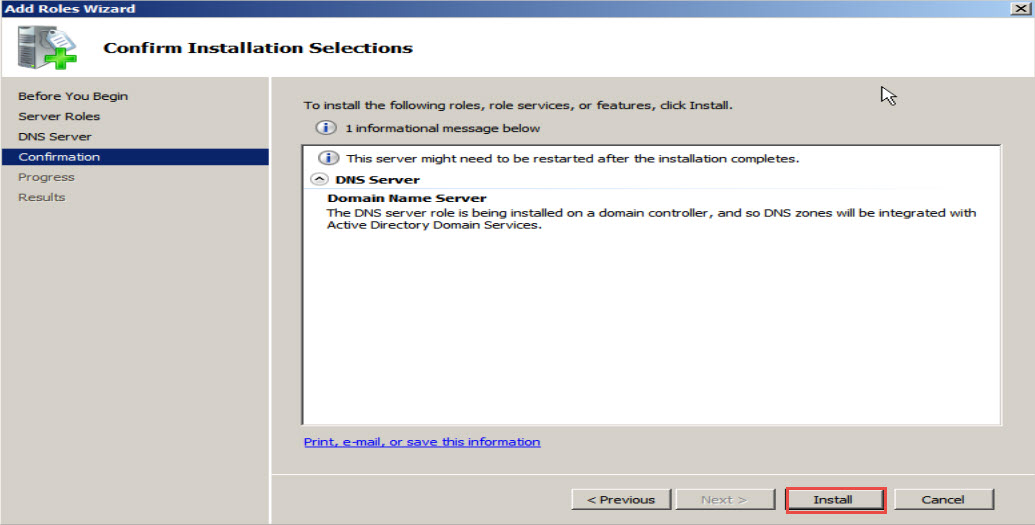
Step 6: Click on the “Install” button in the next window. (Check the screenshot below)
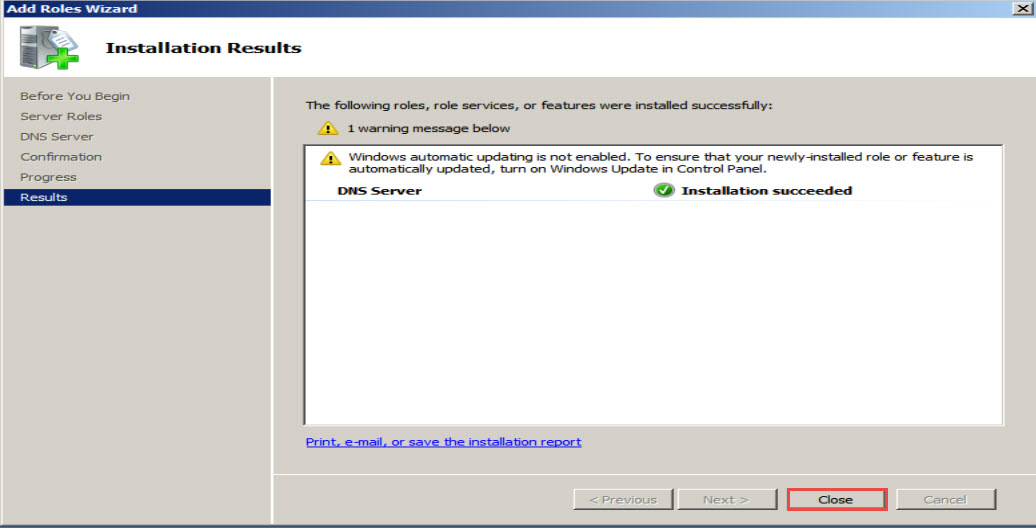
Step 7: A warning message will now appear on your screen. It says – “DNS Server Installation Succeeded.” Click on the “Close” button. (Check the screenshot below)
Now, we are going to configure the Primary DNS and Secondary DNS servers by using the DNS server wizard.
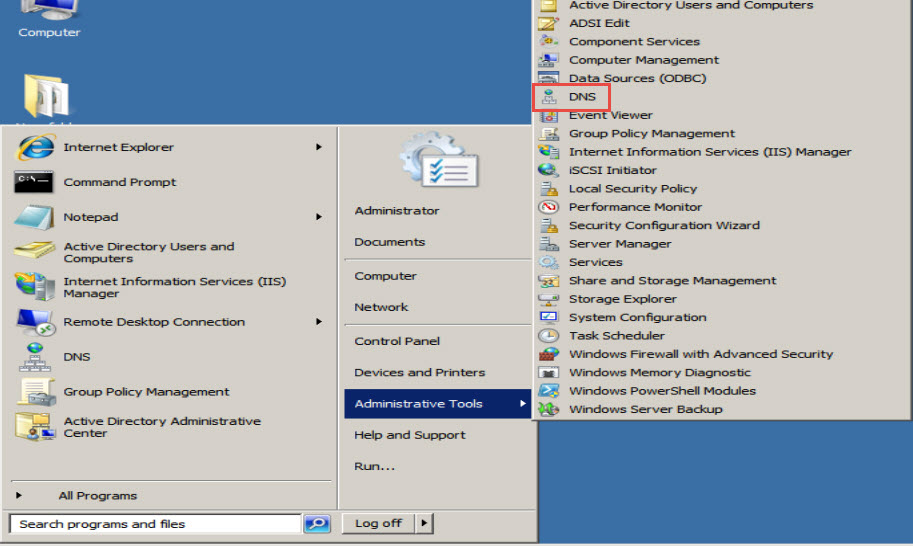
Step 8: Once again, go back to the “Start” button and right click on the “Administrator Tools” option.
Step 9: Click on the “DNS” option. (Check the screenshot below)
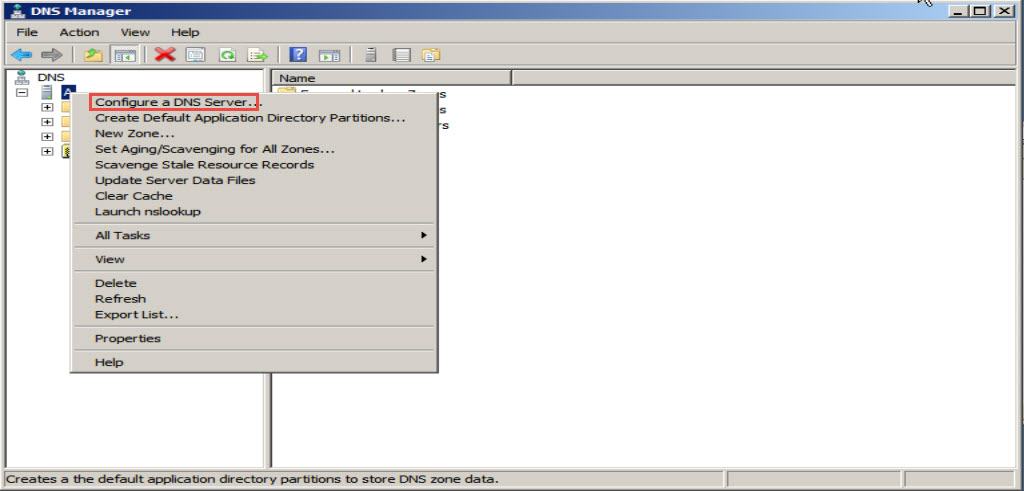
Step 10: The “DNS Manager” window will open up on the screen. Right click on the “Server Name” option in the left panel of the window.
Step 11: Click on the “Configure a DNS Server” option. (Check the screenshot below)
Step 12: A dialogue box will now appear on your screen. Select the option – “Both zones – create Forward Lookup and Reverse Lookup zones.”
Step 13: Click on the “Next” button to continue. (Check the screenshot below)
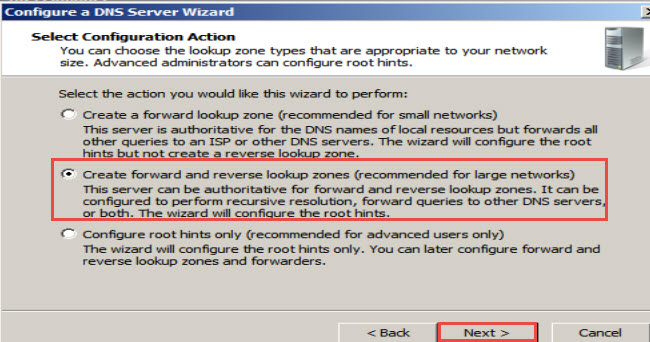
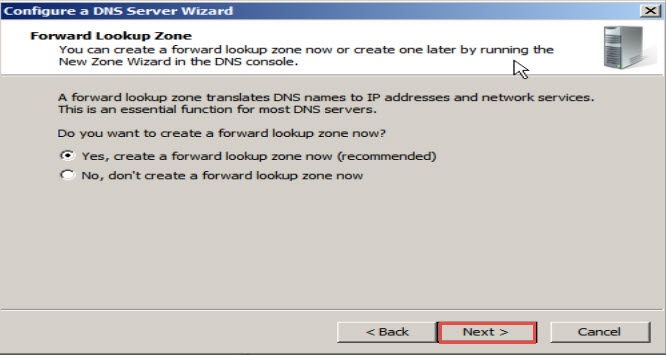
Step 14: In the next window, select “Yes, Create a Forward Lookup Zone Now (Recommended)” and click on the “Next” button to continue. (Check the screenshot below)
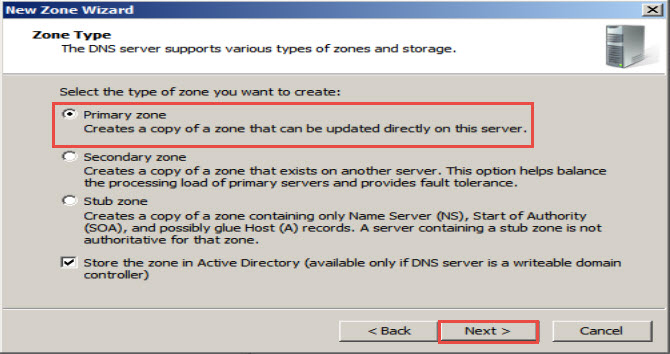
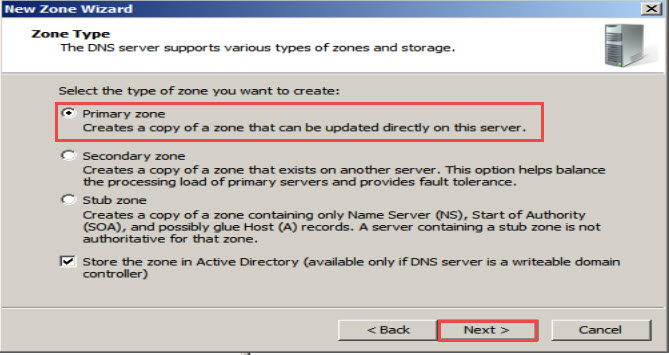
Step 15: Next, select the “Primary Zone” option and check the “Store the zone in Active Directory” option at bottom of the window.
Step 16: Click on the “Next” button to continue. (Check the screenshot below)
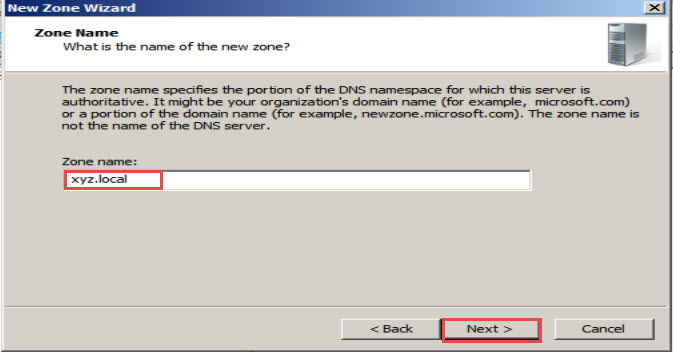
Step 17: In the next window, under the “Zone Name” box, enter a “zone name” with dot and click on the “Next” button to continue. (Check the screenshot below)
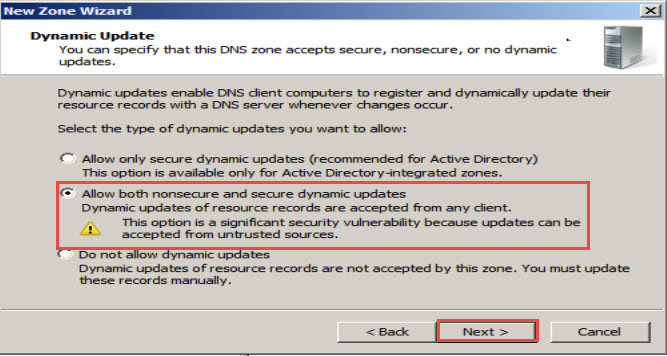
Step 18: Next, select the “Allow Both Non-Secure and Secure Dynamic Updates” option and hit the “Next” button. (Check the screenshot below)
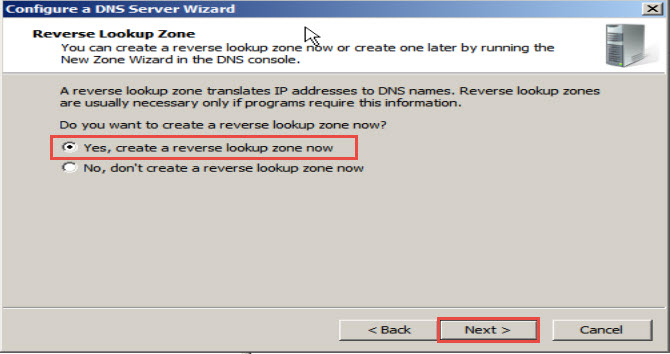
Step 19: Here, you will configure the Reverse Lookup Zone. Select the “Yes, Create A Reverse Lookup Zone Now” option.
Step 20: Click on the “Next” button to continue. (Check the screenshot below)
Step 21: In the next window, select the “Primary Zone” option and click on the “Next” button. (Check the screenshot below)
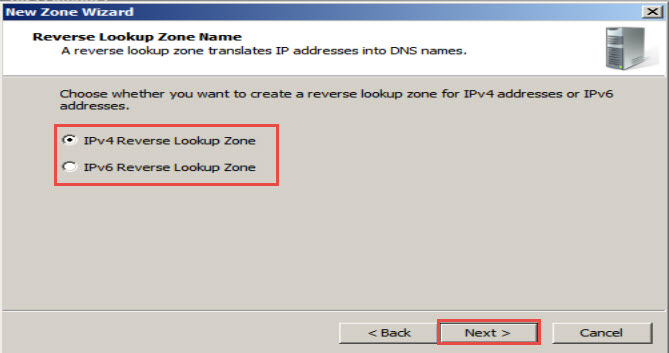
Step 22: Select the “IP version IPv4/IPv6” option and click on the “Next” button. (Check the screenshot below)
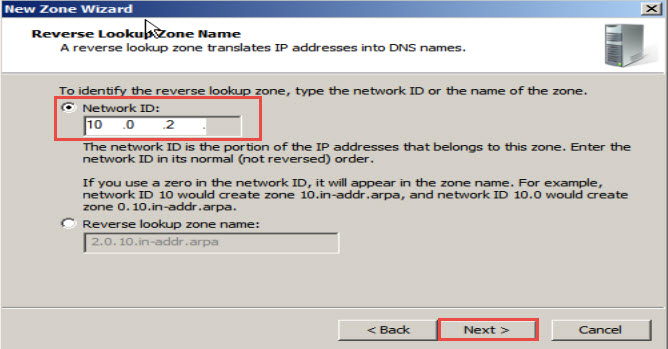
Step 23: Under “Reverse Lookup Zone Name”, type in the “Network ID” of the network which has been used in the DNS server in Windows Server 2008.
Step 24: Click on the “Next” button to continue. (Check the screenshot below)
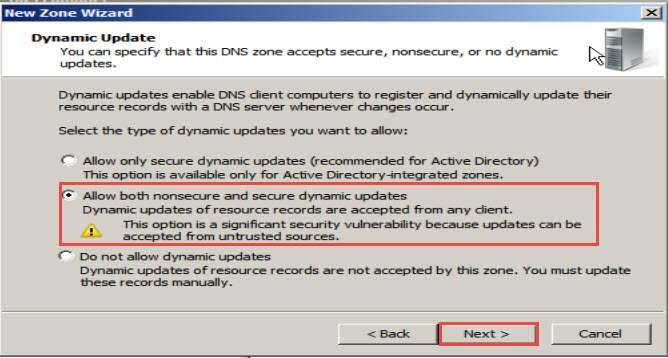
Step 25: Once again, select “Allow both non-secure and secure dynamic update for reverse lookup zone” option and click on the “Next” button to continue. (Check the screenshot below)
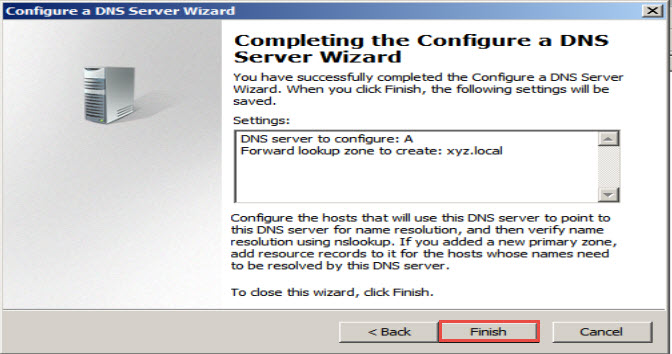
Step 26: Now, the Primary and Secondary Zones have been configured. Click on the “Finish” button. (Check the screenshot below)
Now we are going to add Host or Pointer record in the DNS Server in Windows Server 2008. After that, we’ll be adding a “Name Server Entry” in the DNS server.
Step 27: Right Click on the “Primary Zone” option and click on “Add New Host”.
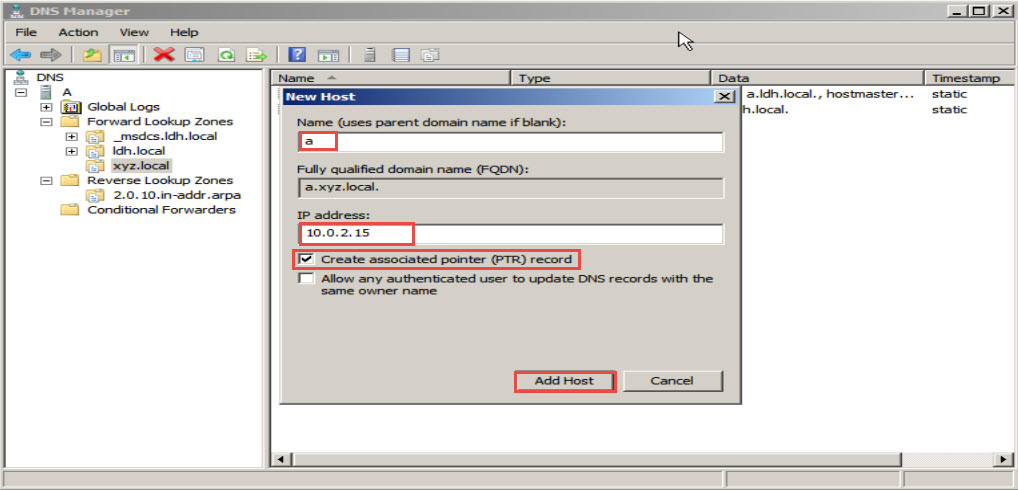
Step 28: In the “New Host” window, enter the “Server Name” in “Parent Domain Name” block and also provide the “IP address” of the DNS server.
Step 29: Select “Create associated pointer (PTR) record” and next, click on the “Add Host” button. (Check the screenshot below)
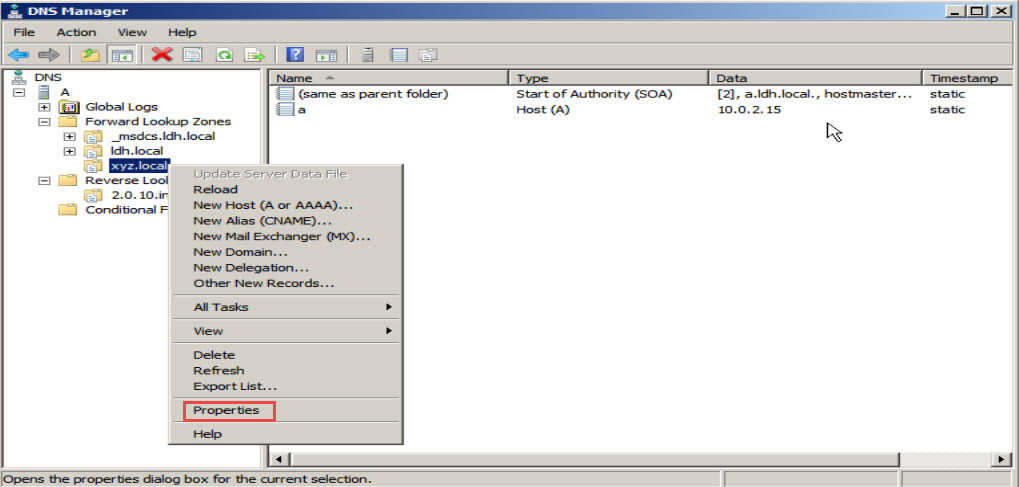
Step 30: Now, you need to add “Name Server” entries in both forward and reverse lookup zones. To do that, right click on the “Domain Name option in the left panel.
Step 31: Click on the “Properties” option in the menu that appears on your screen. (Check the screenshot below)
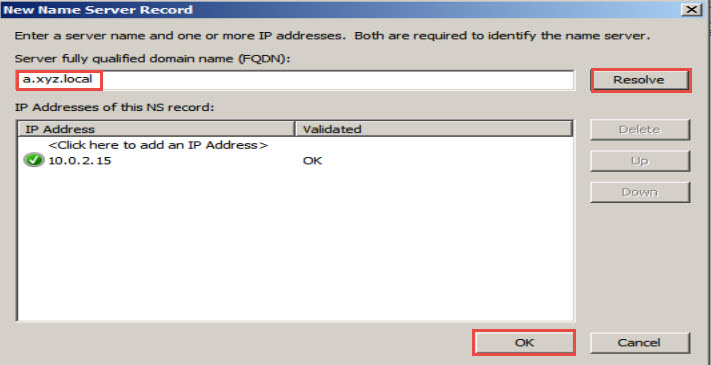
Step 32: Type the fully qualified domain name i.e. a.xyz.local and click on the “Resolve” button.
Step 33: Click on the “OK” button to save the changes. (Check the screenshot below)
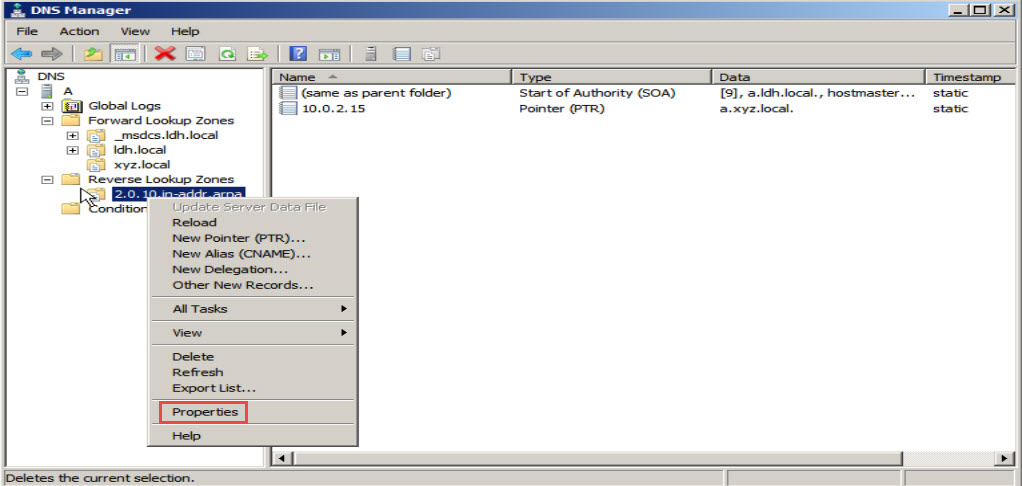
Step 34: Repeat the same procedure for Reverse Lookup Zone. Right click on the “Reverse Lookup Zone” option in the left panel and click on the “Properties” option in the menu that opens up. (Check the screenshot below)
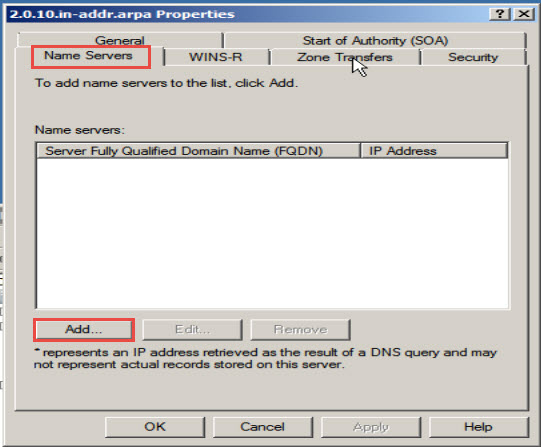
Step 35: In the next window, click on the “Name Server” option and then, click on the “Add” button. (Check the screenshot below)
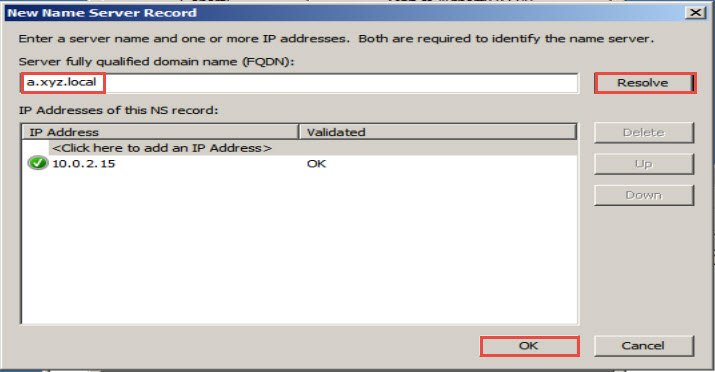
Step 36: Now, type in the fully qualified domain name i.e. a.xyz.local.
Step 37: Click on the “Resolve” button and next, click on the “OK” button. (Check the screenshot below)
Step 38: Listed below are some handy commands to help you verify whether the DNS is working or not:
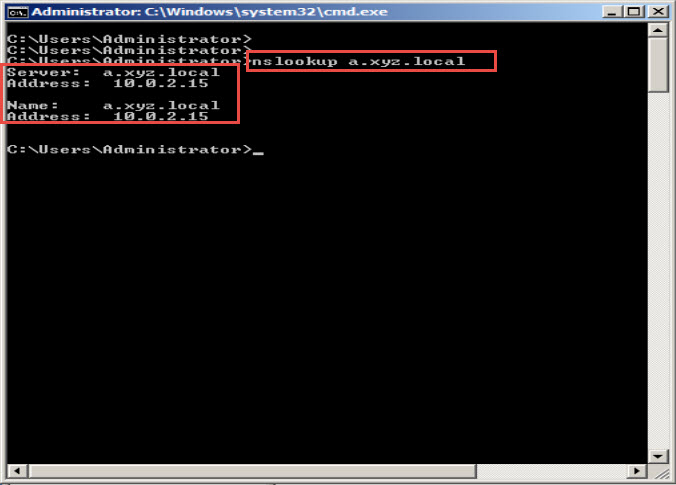
NSLOOKUP: This command is given to test or troubleshoot the DNS server installed in Windows Server 2008. This command also displays the DNS name and the DNS IP address. (Check the screenshot below)
IPCONFIG /ALL: This command shows the IP address configuration (Like IP address, Subnet mask, Default gateway, Primary and alternate DNS server IP address) and the Host Name.
IPCONFIG /FLUSHDNS: This command is given to reset the DNS cache.
Need Help With DNS Installation in Windows Server 2008?
If you ran into some problems while trying to install Domain Name System in Windows Server 2008 as described in the above tutorial, please let us know by writing a comment below.
We will follow-up with the easiest possible solution at the earliest.


