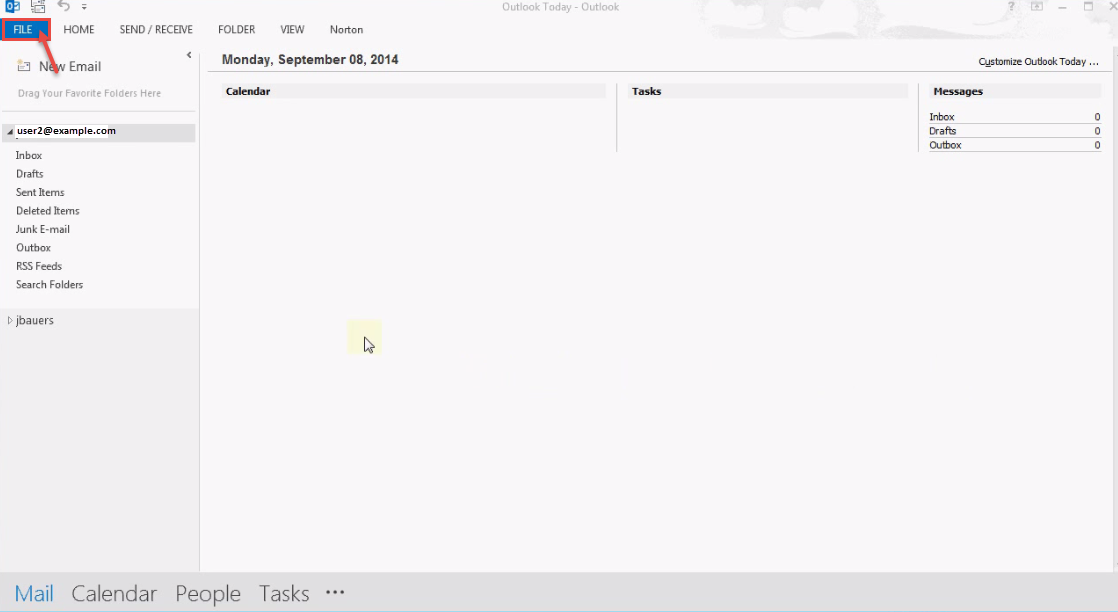
- Click on “File” menu.
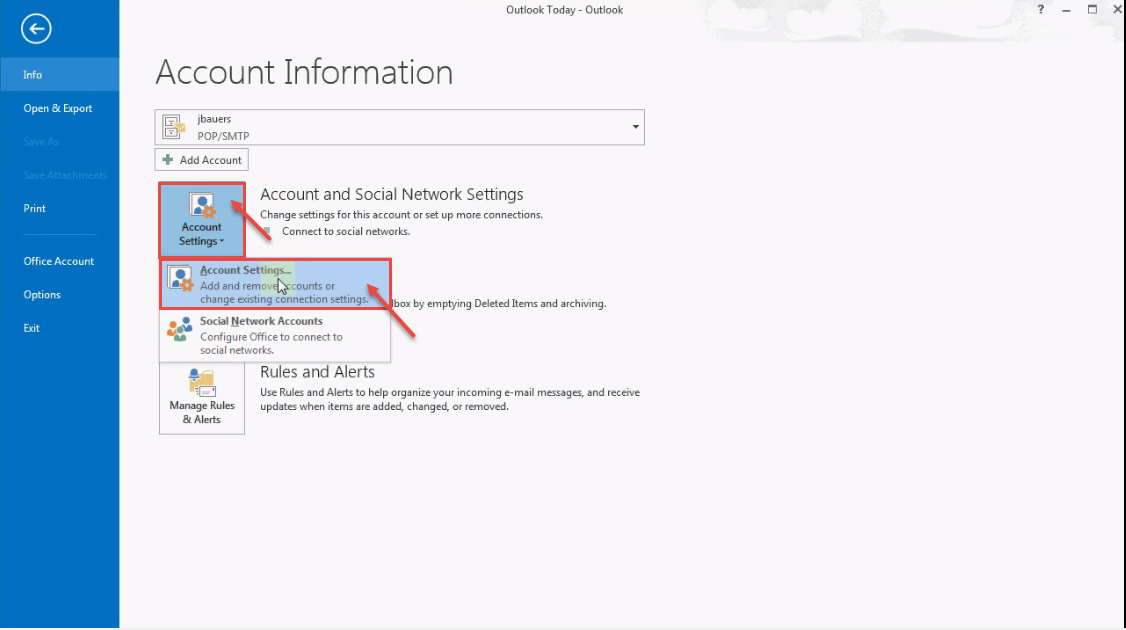
- Select “Account Settings” under “Info” and again select “Account Settings” from the drop-down.
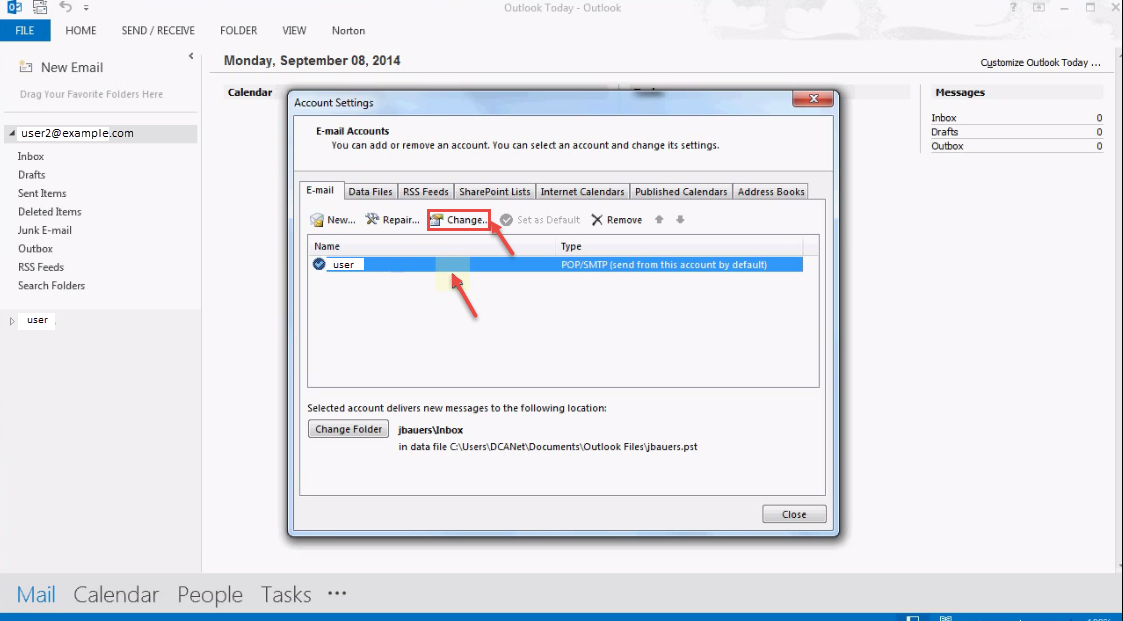
- Select the existing account and click on “Change”.
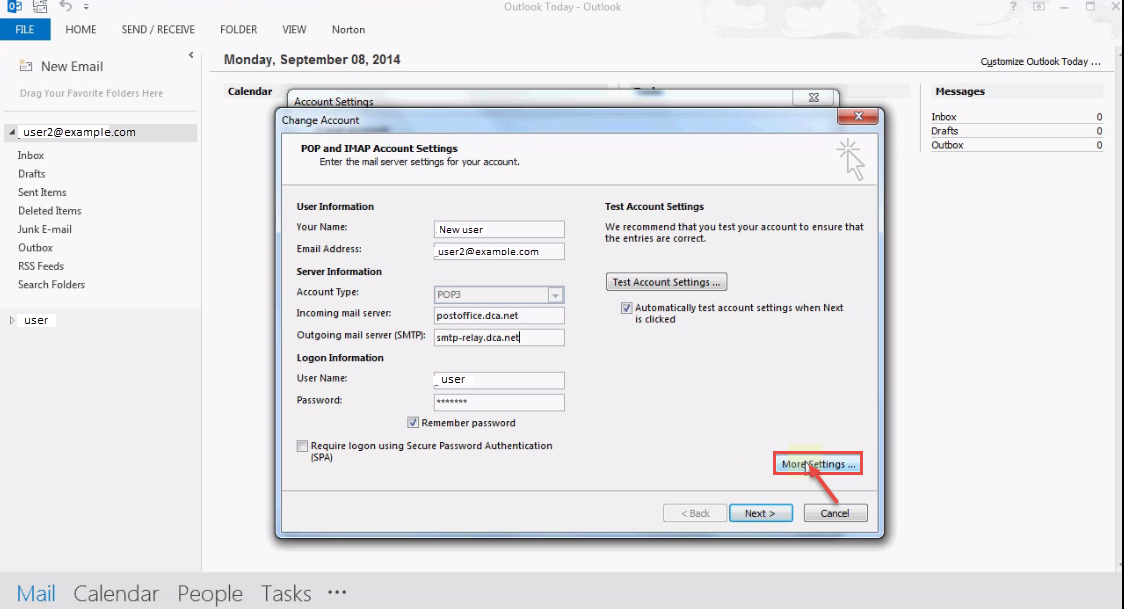
- Select the “Account Type” – “POP3” or “IMAP”. Click on “More Settings”.
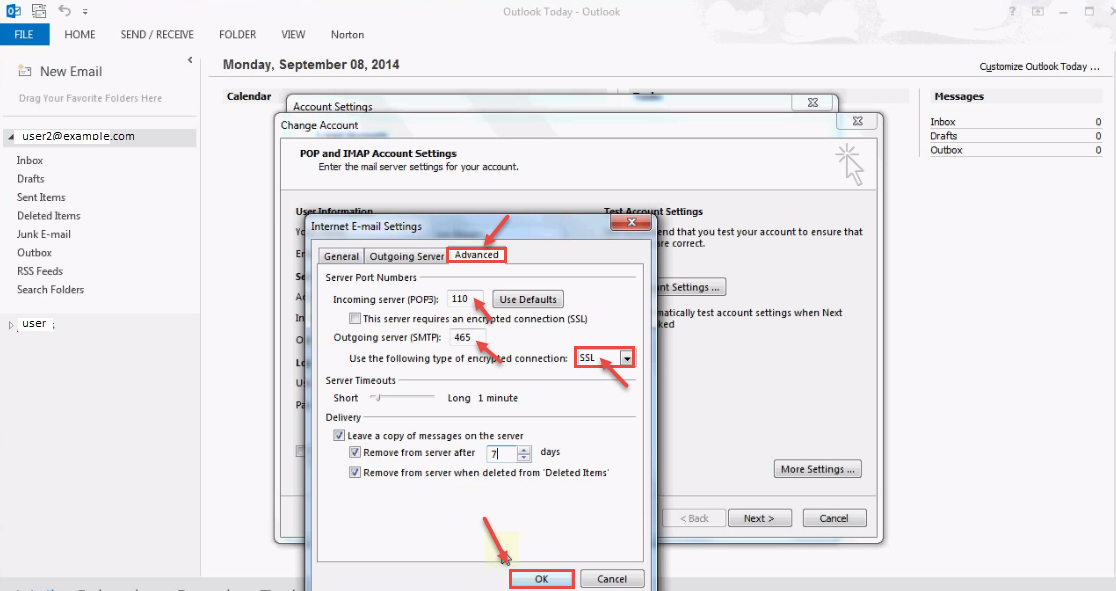
- Select “Advanced” tab from “Internet E-mail Settings” popup. Change the values, as per your Mail Server and click “OK”.
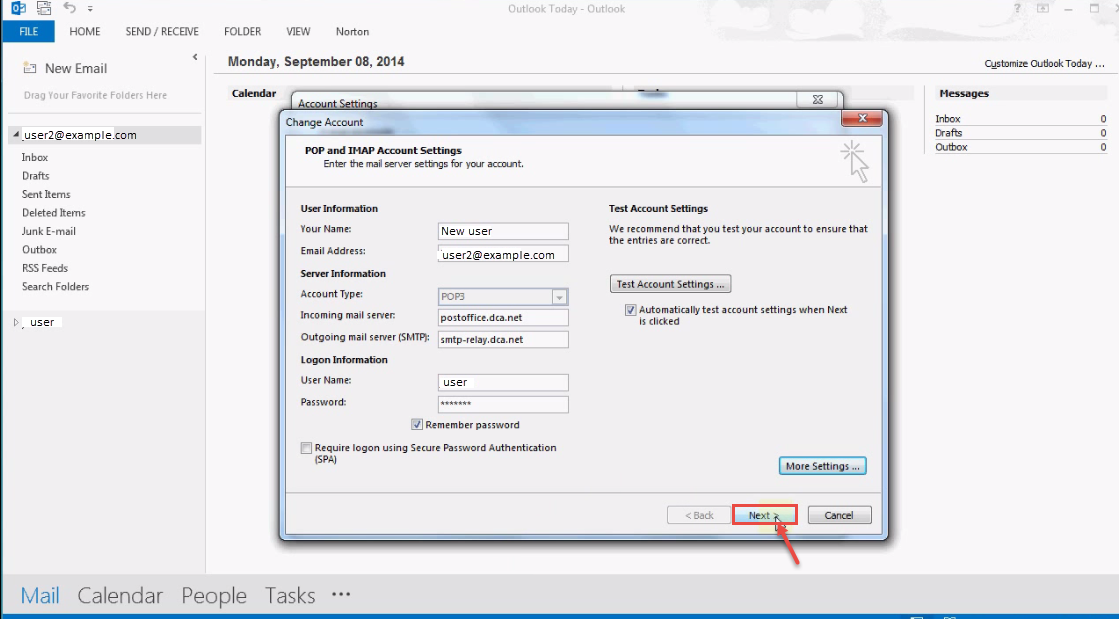
- Click on “Next”.
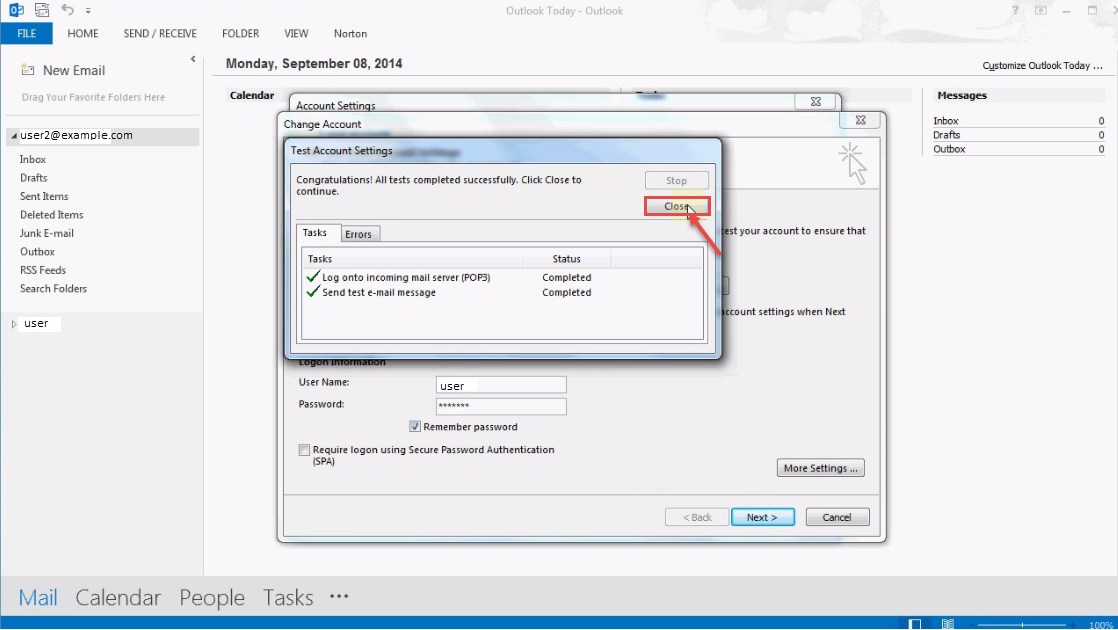
- Click on “Test Account Settings..” button to test the change in settings. If all settings are proper, test result will show “Green” check-marks. Now click on “Close” to continue.
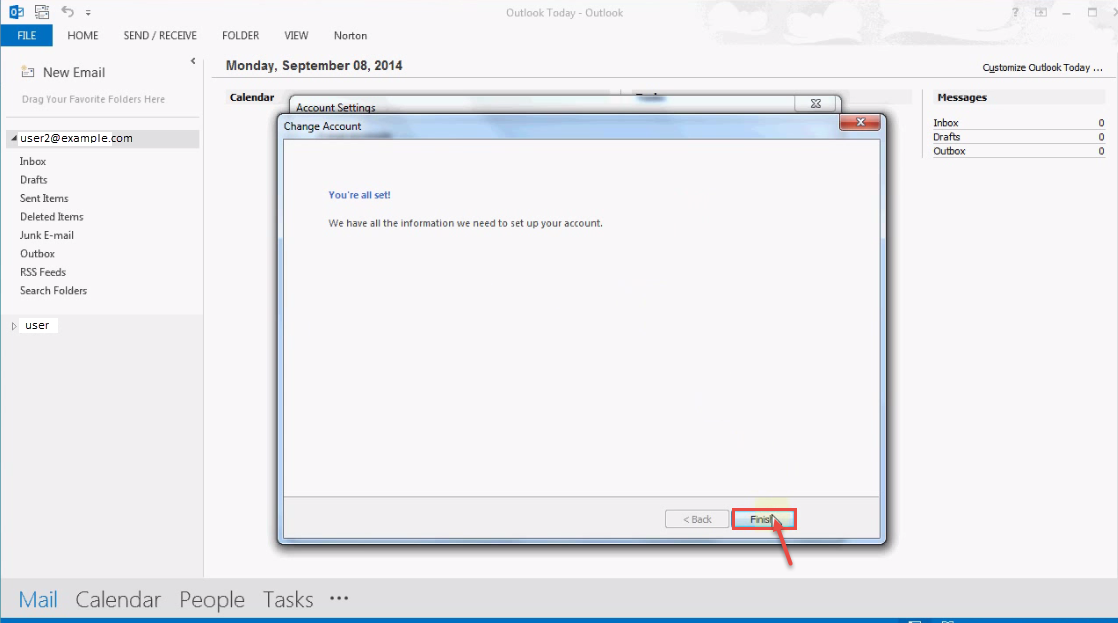
- Click on “Finish” button.
Click here to know How to add new account manually having POP/IMAP error in outlook 2013.

