Server Help – Folder Sharing on Windows 2012
Security, Data Auditing and Disk Quota – all of these can be easily managed by making use of the “Folder Sharing” option in MS Windows Server 2012. It’s helpful for the end user and the System Administrator both.
Since data is stored on a server, the server administrator needs to access or take their data back on weekly, monthly, quarterly or yearly basis. This increases the probability that the data might get damaged.
But in any case, if the user deletes files from their shared folders by mistake, we can easily recover their lost data files from a backup.
You can do that by configuring Folder Sharing options in Server 2012. Here’s a step by step guide:
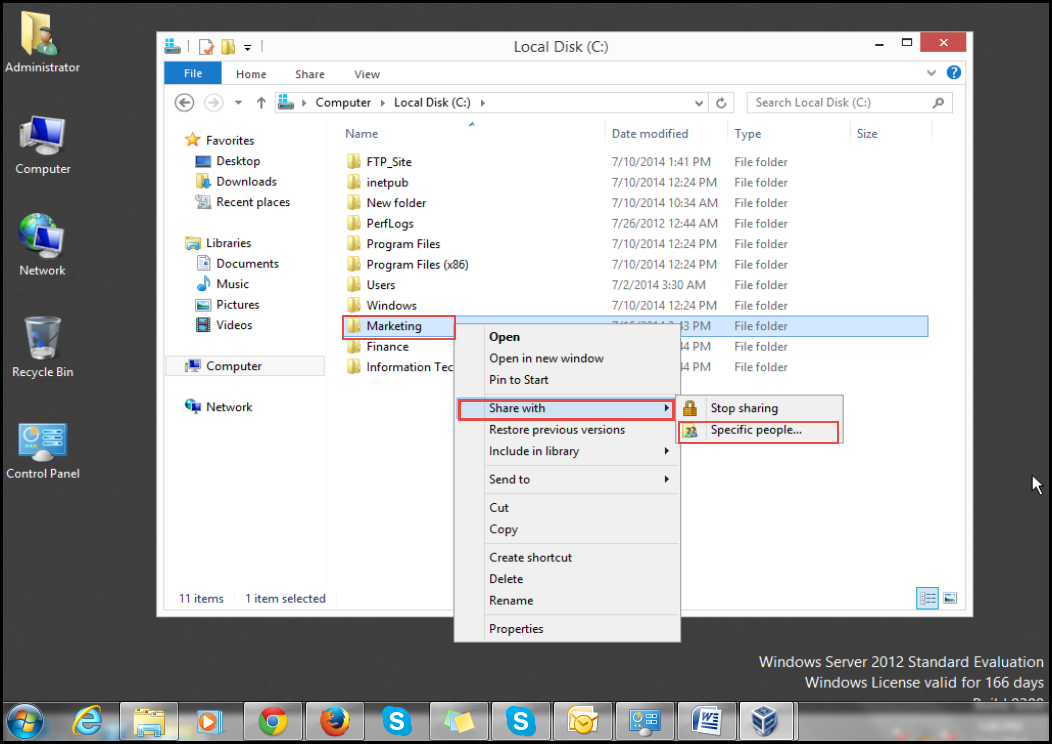
Step 1: Create a folder where you can store data files as per your requirements. Right click on this folder, select the “Share With” option and then, click on the “Specific People…” option. (Check the screenshot below)
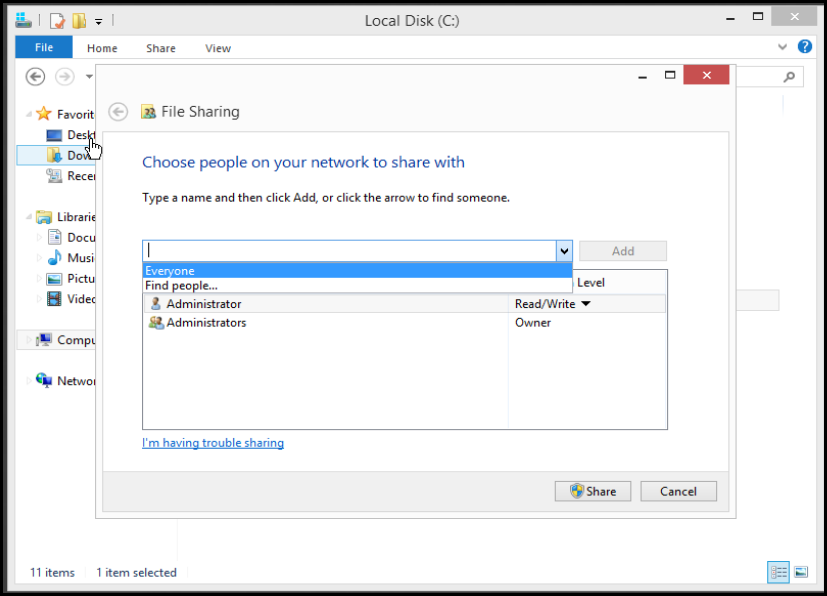
Step 2: You can share this folder all across your organization and everyone on the network. You can share the folder with a specific group too.(Check the screenshot below)
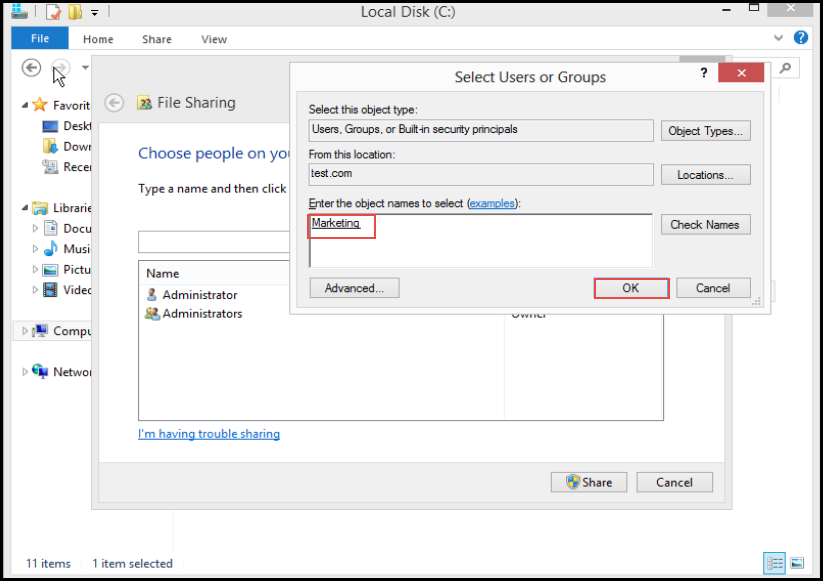
Step 3: To really understand how it works, share this folder with a specific group. Enter the group name, and click on the “OK” button to apply the changes. (Check the screenshot below)
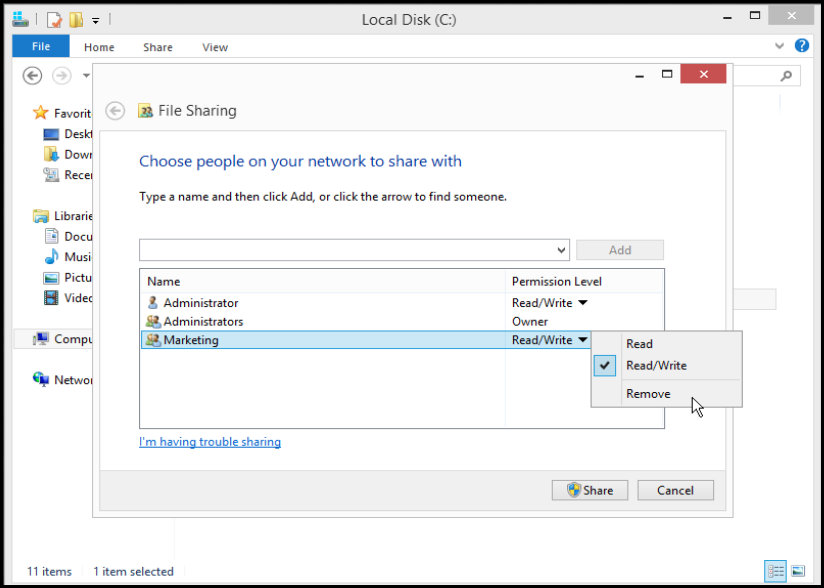
Step 4: Select the “Permission Level” option and click on the “Share” button. (Check the screenshot below)
Step 5: When you have successfully shared the folder on Server 2012, click on the “Done” button.
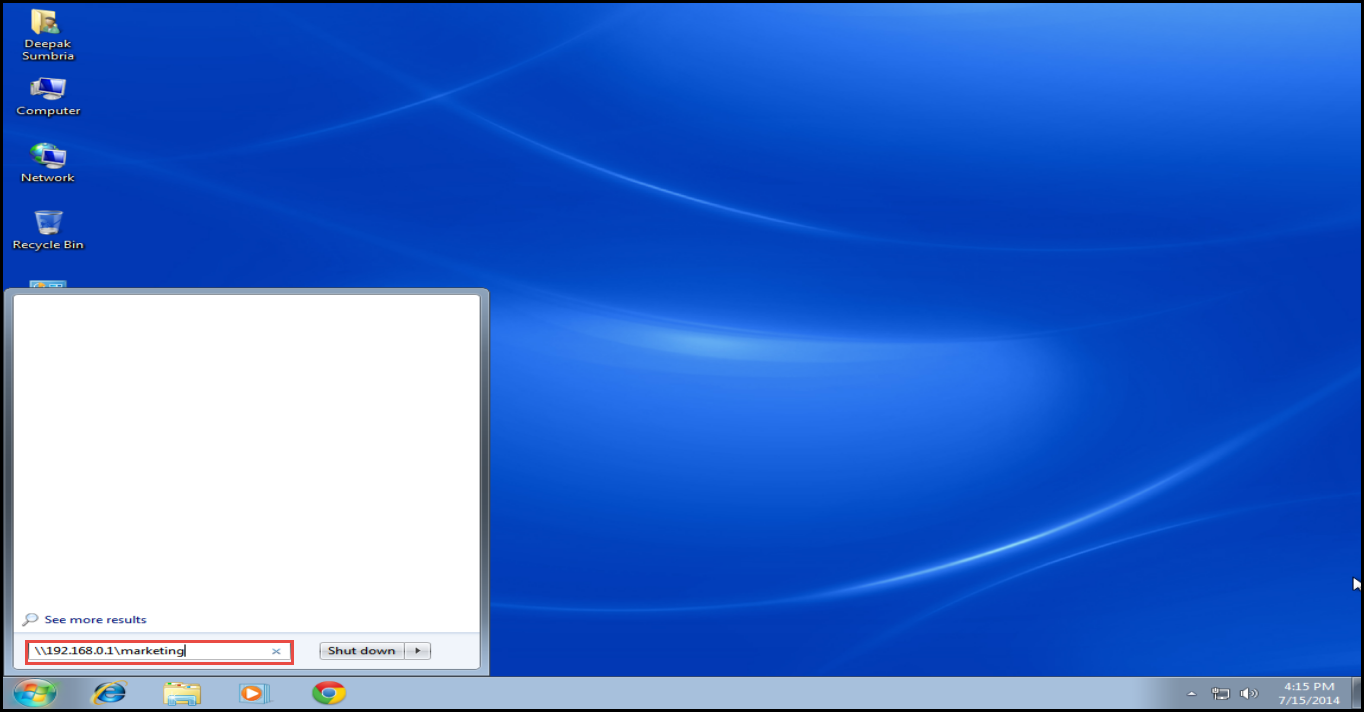
Step 6: Go to the “Run” utility and enter the “Server IP Address” to access shared folders. (Check the screenshot below)
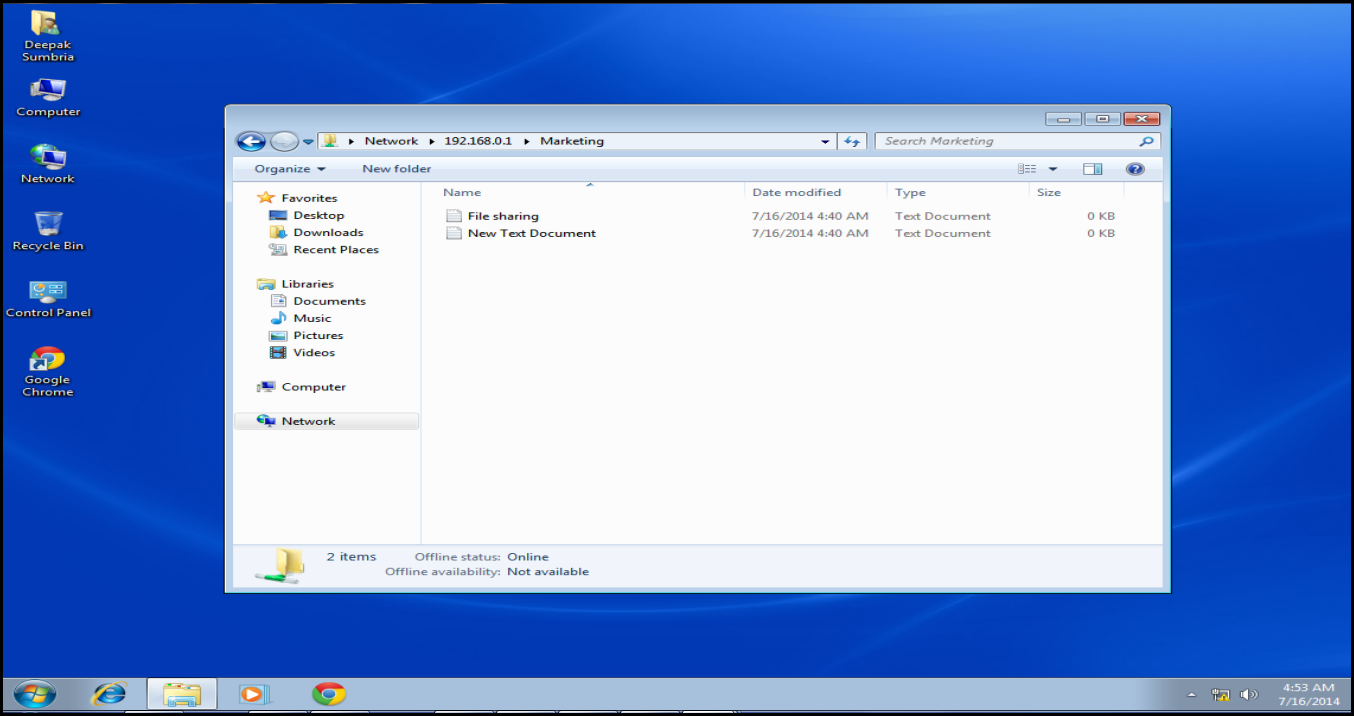
Step 7: This is how you access the shared folder on a client machine. (Check the screenshot below)
Did it work for you?
If not, don’t worry! We are here to help you with any questions you might have. Drop your queries related to folder sharing problems in Server 2012 in the comment section below. One of our experts will reply in-line so that others facing the same problem need not ask for help again.


