Microsoft Server Support Obtain IP address
DHCP (Dynamic Host Control Protocol) comes handy on many occasions. If you’re on a client machine and want to obtain a new IP address for it from Win Server 2012, let us tell you that it’s fairly easy!
Here’s a step by step guide on how to acquire an IP address from Windows Server 2012 DHCP on client machine:
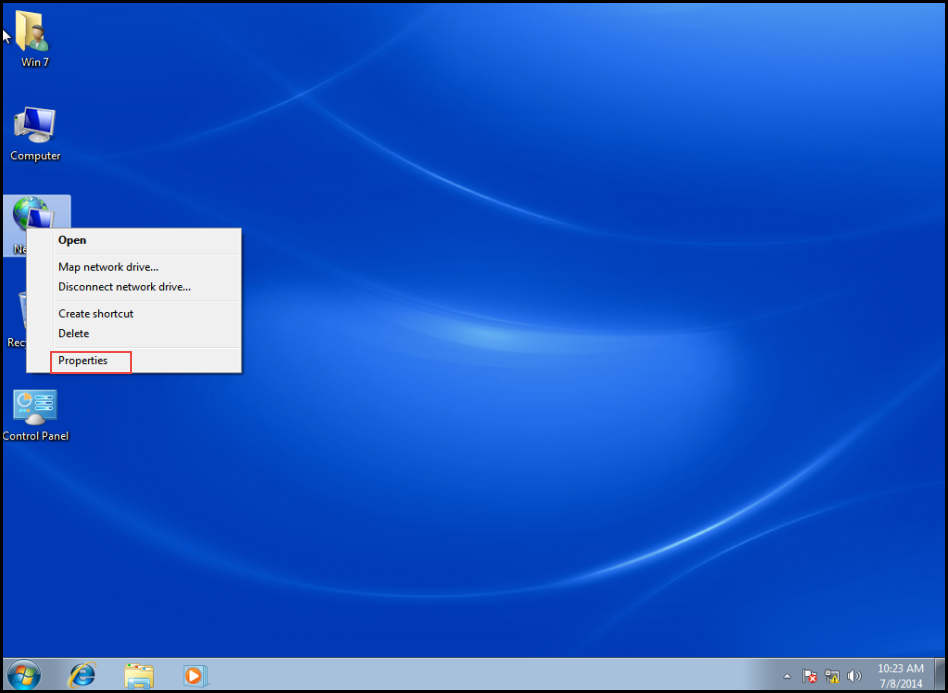
Step 1: Right click on “Network” icon on your desktop and select the “Properties” tab from the dropdown menu. (Check the screenshot below)
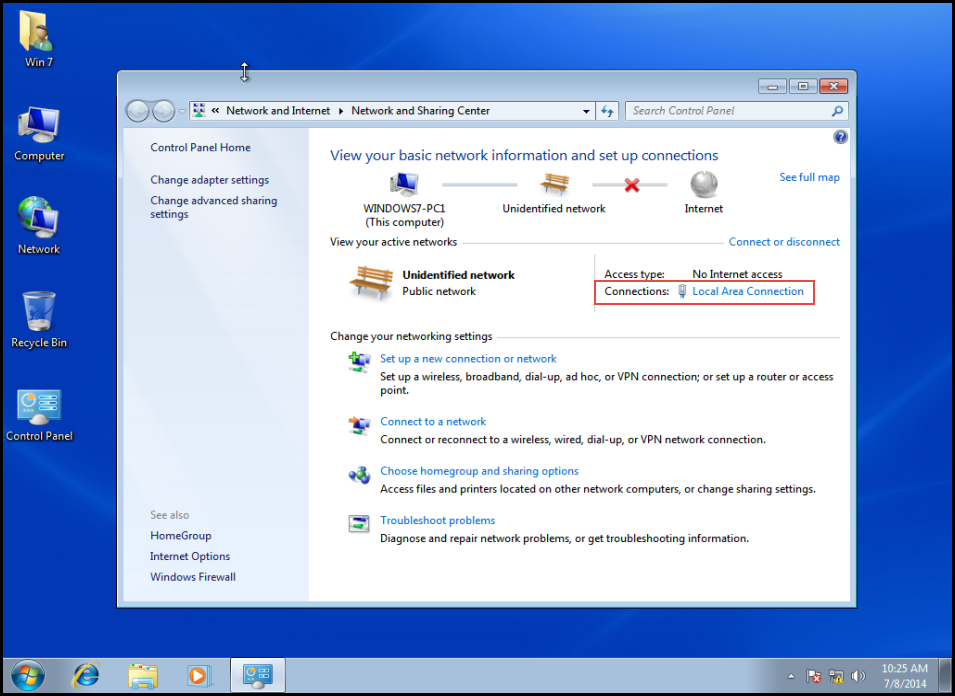
Step 2: Next, click on the “Local Area Connection” option. (Check the screenshot below)
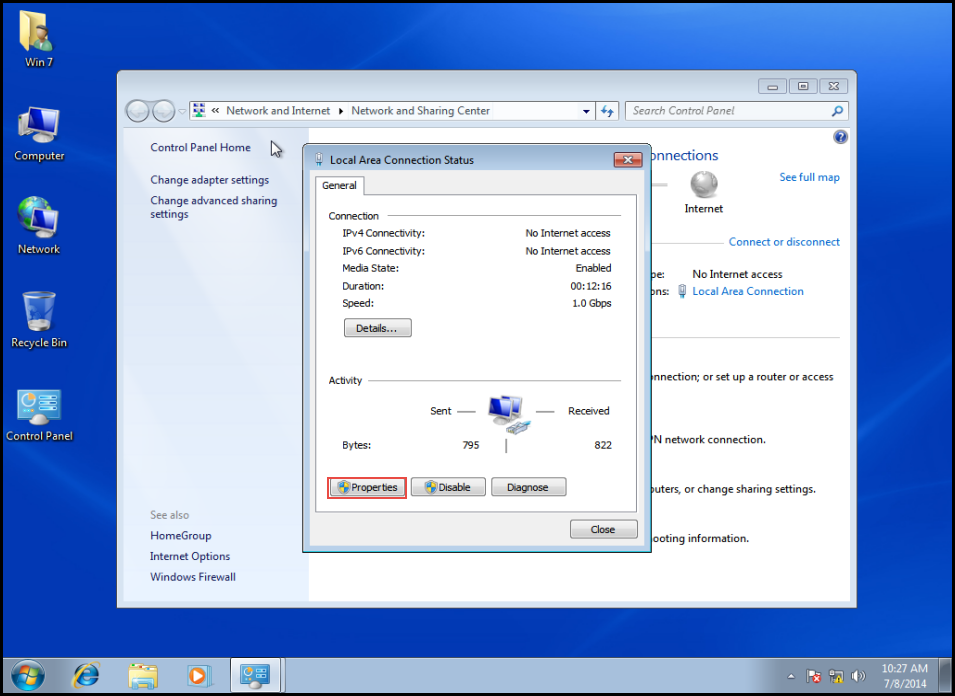
Step 3: The “Local Area Connection Status” dialogue box will appear on your screen. Click on the “Properties” button. (Check the screenshot below)
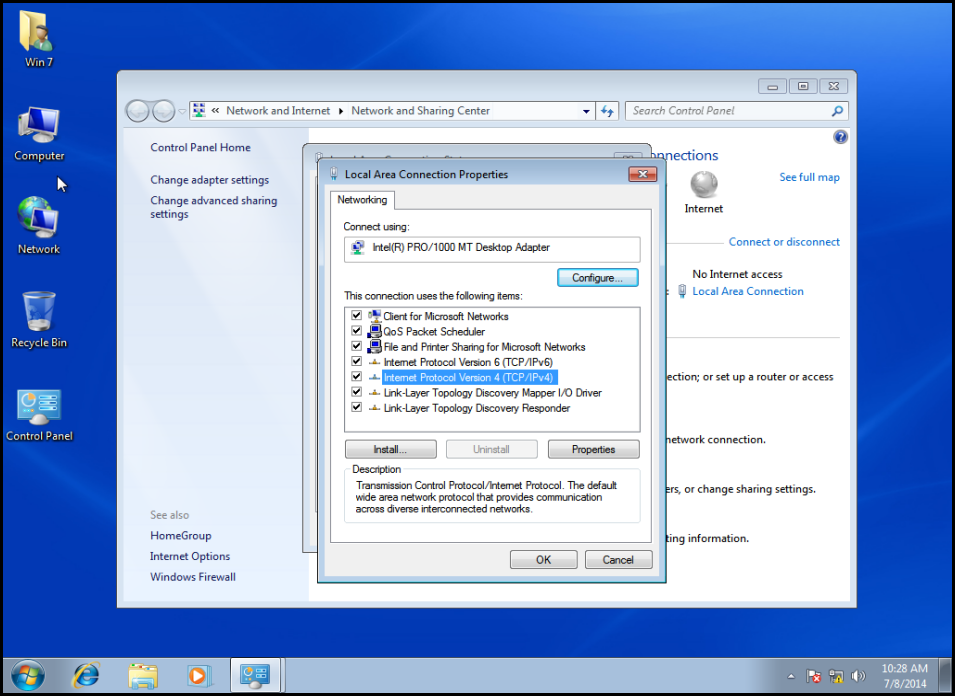
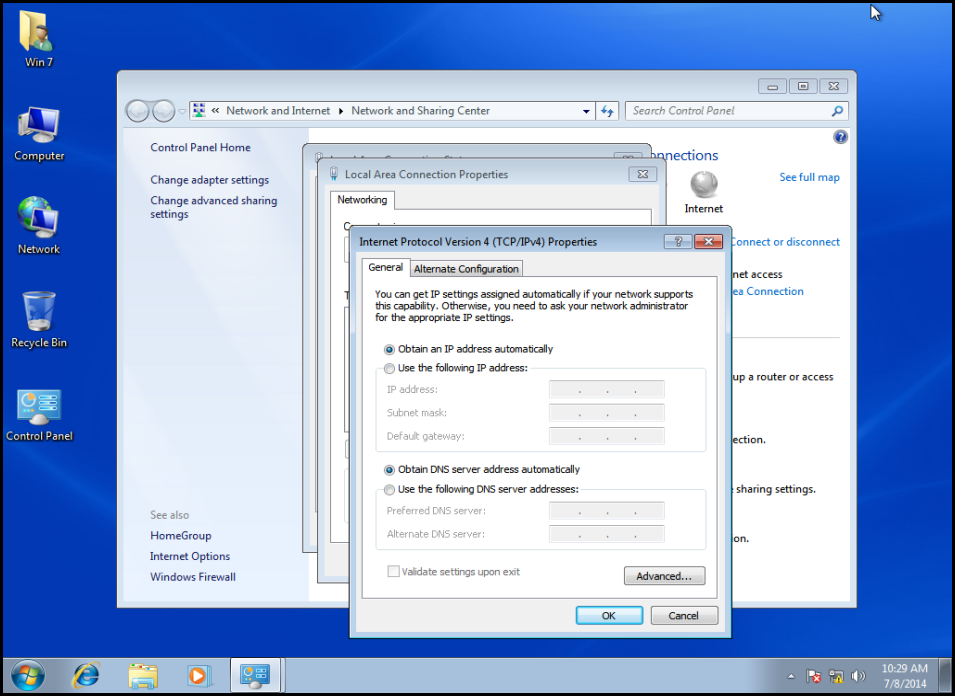
Step 4: Select the “IPV4” option and click on the “Properties” tab again. (Check the screenshot below)
Step 5: Select the “Obtain an IP Address Automatically” option and click on the “Ok” button. (Check the screenshot below)
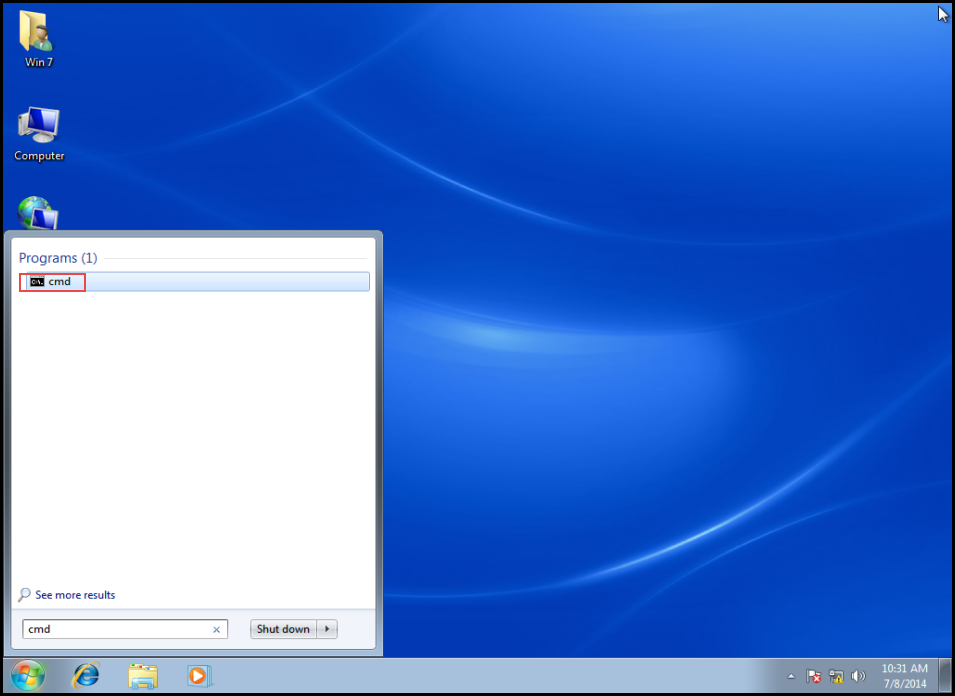
Step 6: Launch the “Command Prompt”. (Check the screenshot below)
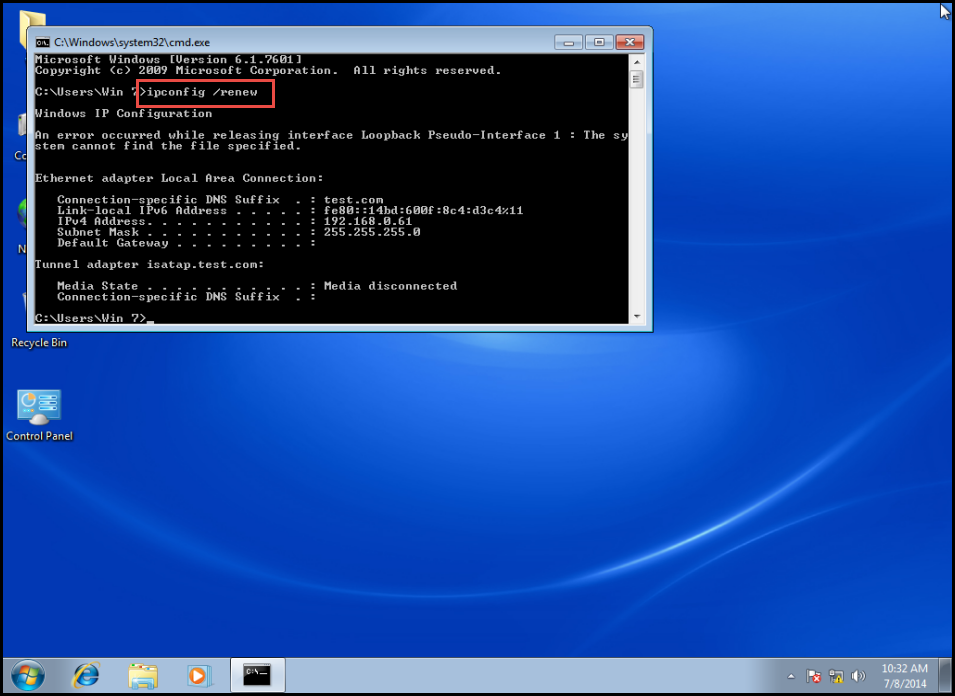
Step 7: Enter the command “ipconfig /renew” to renew the IP address. (Check the screenshot below)
Step 8: Right click on the “Network” option and click on the “Local Area Connection” option.
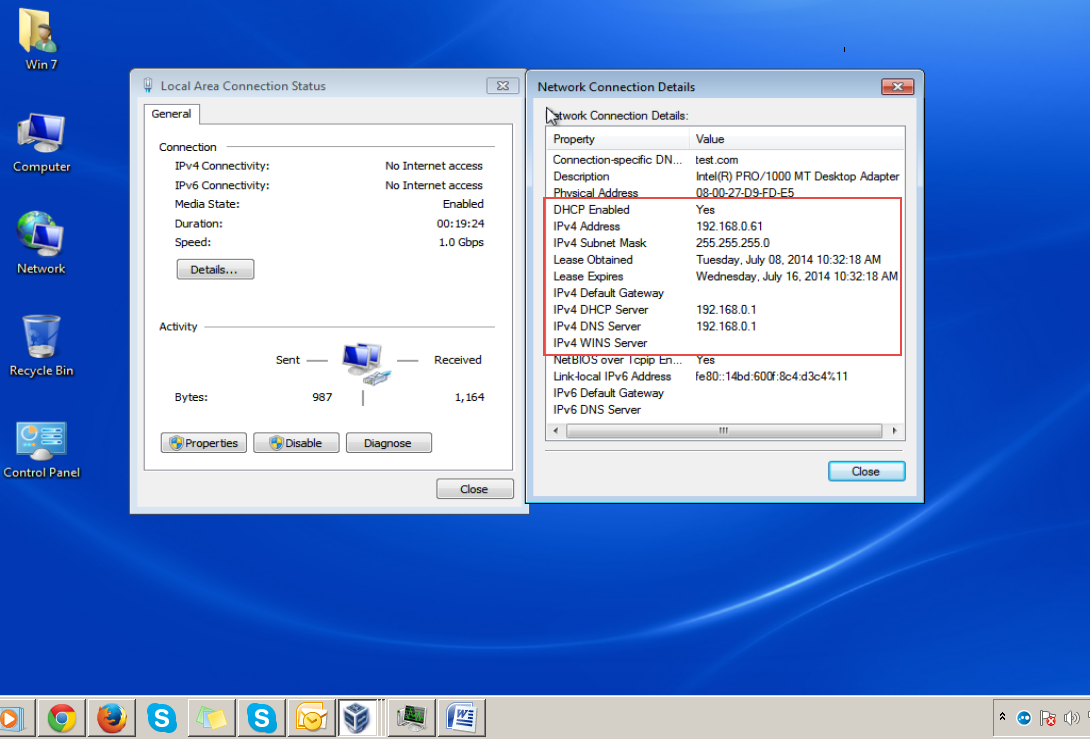
Step 9: Click on the “Details” tab. (Check the screenshot below)
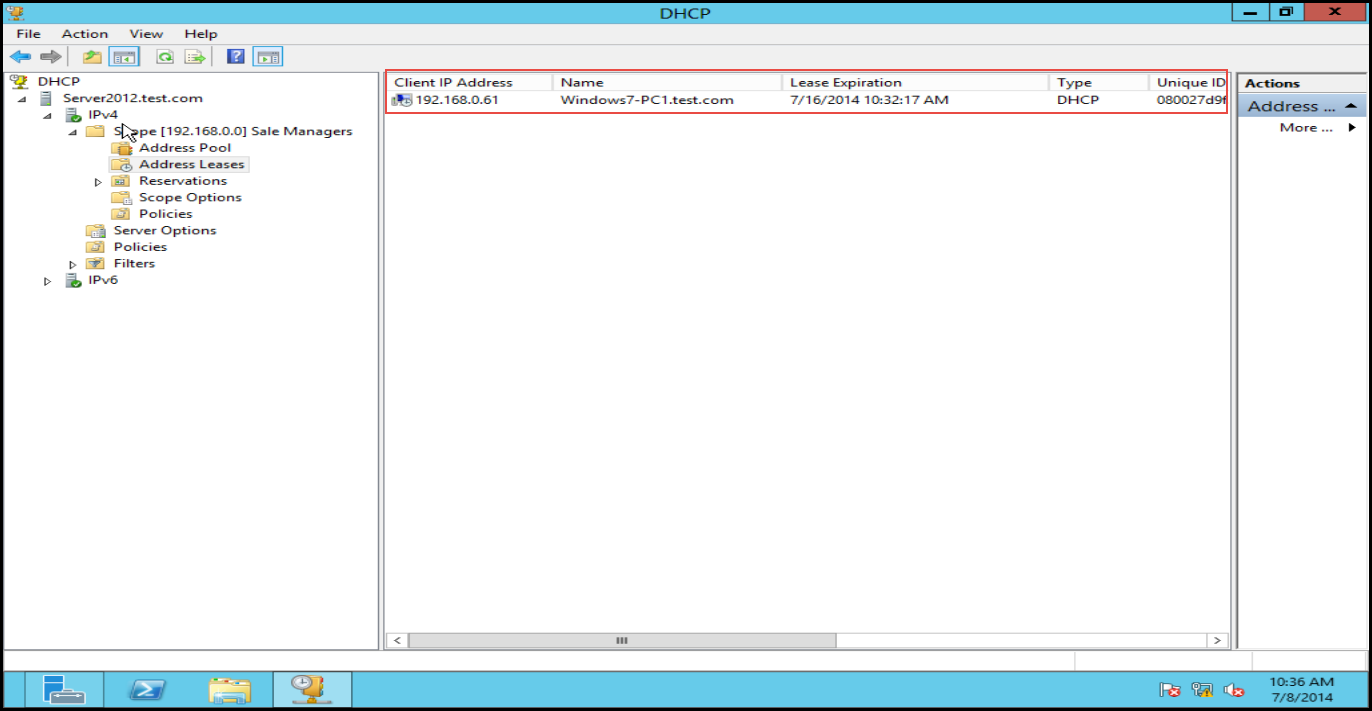
A new IP address has been obtained from the DHCP Server 2012.
Step 10: Here, we have the IP assigned to your client machine by the DHCP Server 2012. Congratulations! (Check the screenshot below)
Are you experiencing any difficulties while trying to obtain a new IP address from DHCP Server 2012? Any IP address conflicts in sight?
Let us know. We’d like to help.
(Please post questions/doubts etc. in the comment section below. We will follow up with detailed answers/solutions there).


