An Exchange public folder can provide shared access to several people using Outlook Web App – Web App for Exchange 2013, Outlook 2007, Outlook 2010, Outlook 2013, and Outlook for Mac.. It allows a group of users to view and send e-mails from a common mailbox. These users can also share common calendar. Users can store, organize and manage information among themselves.
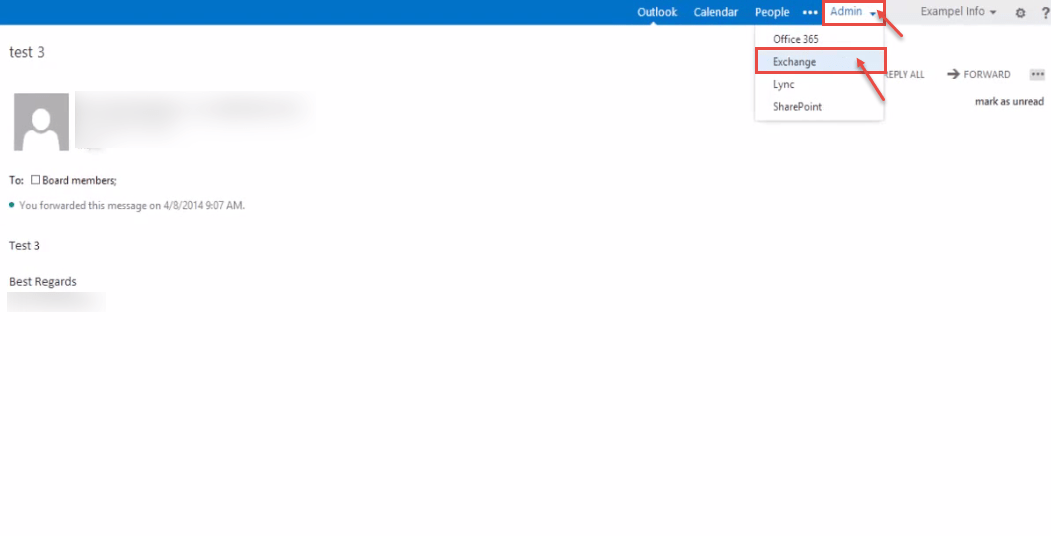
- Log into your Office 365 account with Admin privileges. Click on “Admin” and select “Exchange”.
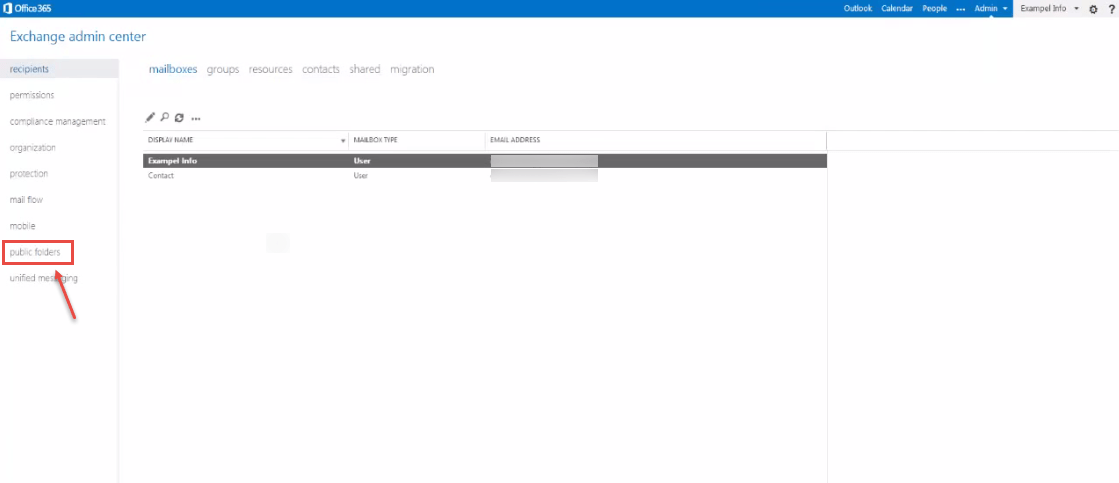
- From the “Exchange admin center”, click on “Public folder” in the left.
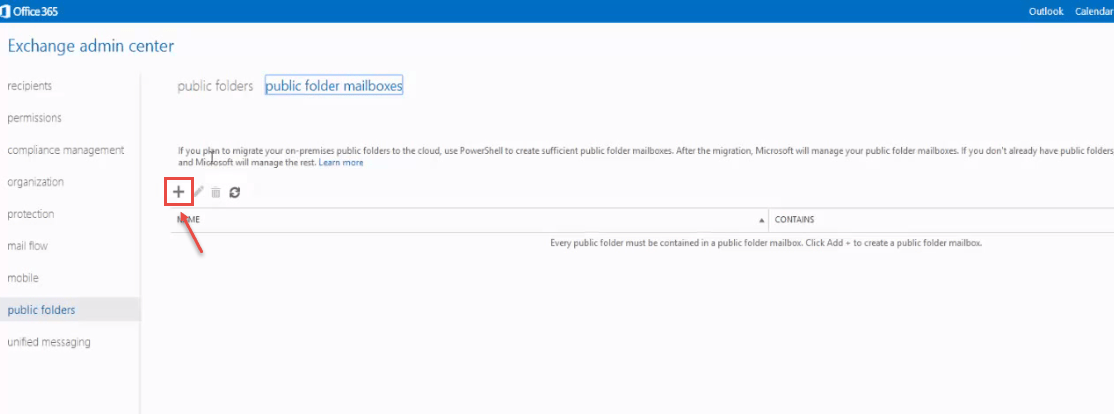
- The resultant dialog box has 2 options -“public folders” and “public folder mailboxes”. Select “public folder mailboxes” to add the mailbox.

- Press the “+” icon.
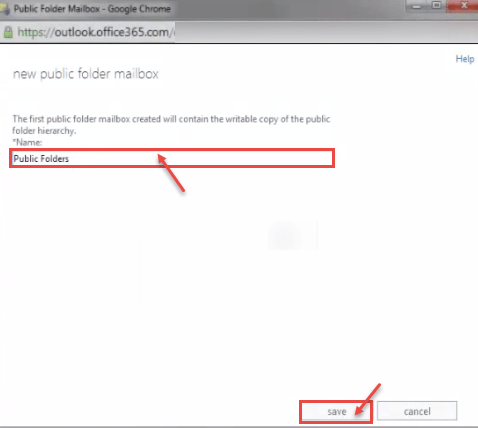
- In the “new public folder mailbox” dialog box, enter the name for the public folder and click on “Save”.
- In “Exchange admin center” -> “public folder”, you will now see the newly created mailbox in the list of public folder mailboxes. Select “public folders” in the top navigation.
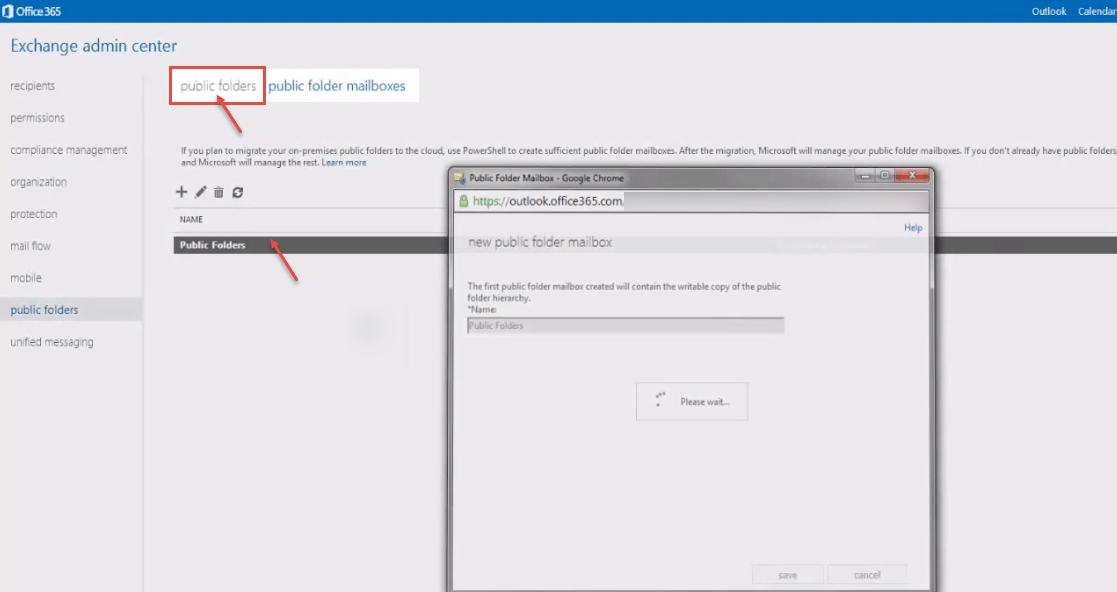
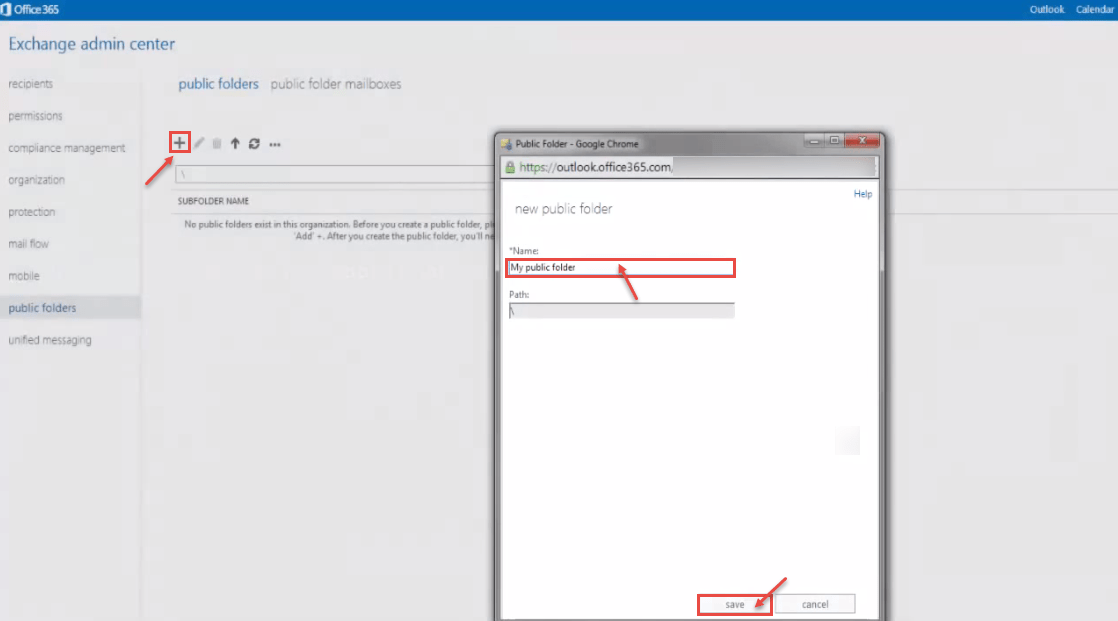
- Click the plus sign and enter a name for the public folder. This is the name that will be visible in Outlook. You don’t have to enter anything in the Path field. Click on save button.
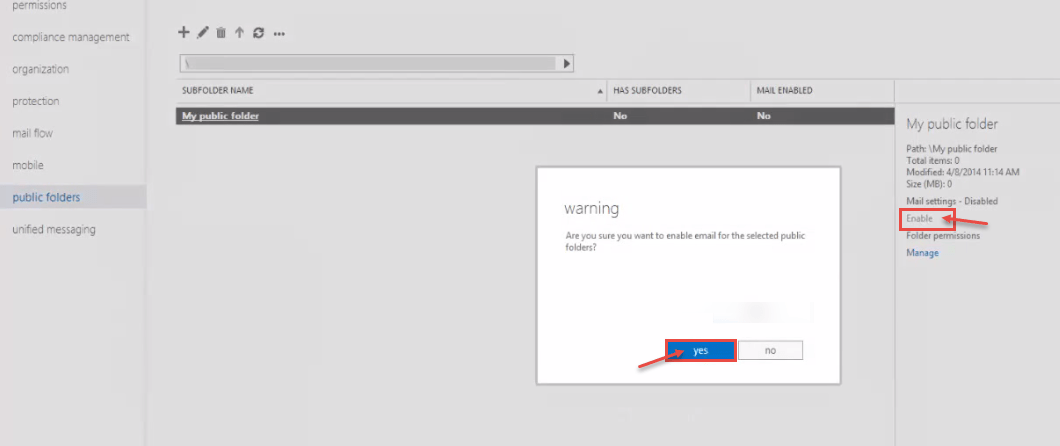
- Now you will see the new public folder in the list.

- Now, Enable the mail settings by clicking the “Enable” from the lists in the right pane. Warning dialog box appear on the display screen. Click “Yes” button to confirm.
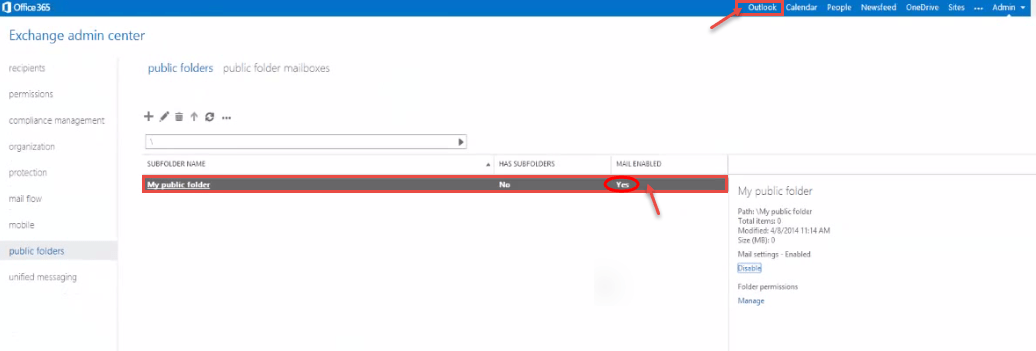
- You can view “My Public Folder” enable in your desktop screen. Click on “Outlook” for opening Outlook 365.
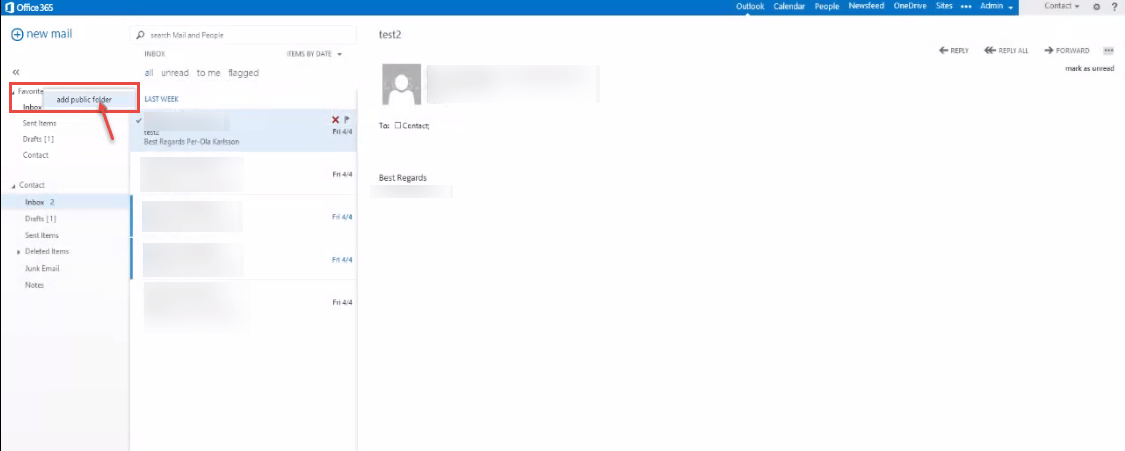
- When Office outlook 365 window appears on your screen, right click on Favorites and select add public folder.
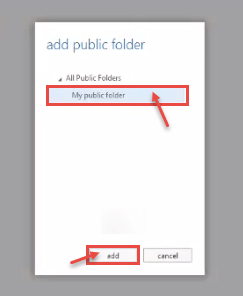
- Choose the folder you want to add. Then click add.
- Your Public folder is added. Now you can forward emails to your public folder.


